live_tv
Livestream Starting Soon
00
Hours
:
00
Minutes
:
00
Seconds
Up next in 10

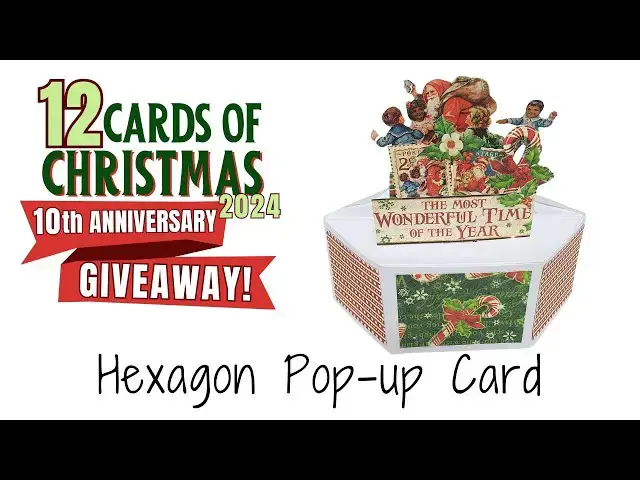
Get the measurements: https://mailchi.mp/3fd4f24cfc2d/12cardsofchristmas2024
🎁 To enter the 10th anniversary giveaway you need to tell me what prize combo you choose
9details on these prizes can be viewed on my website - link below):
1. One year of VIP Room membership
2. One year of Art Journal Club membership
3. One online course
4. One eBook
5. Ten Printable kits from the Paper Perks collection (examples can be viewed on YT channel)
6. One post office flat box with craft supplies such as but not limited to scrapbook papers (different sizes), embellishments (buttons, ribbons), stickers, ephemera, cutouts, tags etc.
7. Private 1 hour Zoom call with me about any subject, project or craft advice you want
💥 WANT EXTRA ENTRIES??
Go to the full giveaway post on my website to find out how you can get 12 extra entries and increase your chances to win!! https://einatkessler.com/12-cards-of-christmas-2024-10th-anniversary-giveaway/
The 12 Cards of Christmas 10th Anniversary Giveaway is in full compliance with YouTube Terms of service and community guidelines. YouTube is not a sponsor of this giveaway and viewers release YouTube from any liability related to this giveaway.
Official giveaway rules: https://einatkessler.com/12-cards-of-christmas-giveaway-official-rules/
Show More Show Less View Video Transcript
0:01
[Music]
0:06
hi everyone in at kler here with a new
0:08
video tutorial and I have some news for
0:16
[Music]
0:19
you I can't believe it the 12 cards of
0:22
Christmas series is
0:24
celebrating its 10th anniversary and
0:27
we're celebrating together with you with
0:30
a never seen before amazing giveaway
0:33
this ultimate giveaway will have 12
0:37
different winners each of them will
0:39
choose their own prize Yes you heard me
0:43
so check out all the details how to join
0:48
below what an exciting giveaway learn
0:52
how to increase your chances of winning
0:54
in the description below you can have
0:57
your name so many more times in the raff
1:00
go ahead and check it out and also there
1:02
is a link to all the measurements in the
1:04
description so let's get started with
1:06
our hexagon popup card welcome to the 12
1:10
cards of Christmas Series today we are
1:13
making card number 10 so we have our
1:16
base we're going to score that at half
1:18
an inch 2 3 and 1/2 and 5
1:24
in so we're going to score that again at
1:27
on the long side at half an inch to 2 3
1:30
and 1/2 and five and we have two pieces
1:34
that are exactly the same so we're going
1:36
to score that second piece exactly the
1:40
same at half an inch to 3 and 1/2 and
1:50
5 so once we are done with this scoring
1:53
we're going to score our strips We're
1:55
going to score the strips at 1 and 7/8
2:00
4
2:01
and8 and 6 in again we're going to score
2:05
the strips we have two of those so
2:08
exactly the same on the long side at 1
2:11
and 7/8 4 and 1/8 and 6
2:17
in so we're going to make a really
2:20
cute uh hexagon popup card this is a
2:24
really cute
2:27
one okay so now we're done with all the
2:30
scoring let's bring our
2:34
pieces now what we're going to
2:36
do is hold our
2:40
base with the long
2:44
side facing up and we're going to make a
2:48
mark on the 1 in with a pencil 1 in from
2:51
the left
2:53
side and then 1 in from the right side
2:56
so we're making two 1 in Marks One one
2:59
on each side and we're going to do that
3:02
on the top as well so two marks on the
3:05
bottom two marks on the side 1 in from
3:09
the
3:10
edge so now we're going to draw a
3:14
diagonal line from that Mark that we
3:16
made to the score line
3:20
below and we're going to do that on all
3:23
four sides so the diagonal line goes
3:26
from the pencil Mark to the Edge where
3:31
the score line is up until the score
3:37
line so this is how it
3:40
looks and then we're going to
3:44
either make all the marks on the other
3:47
side I just align both together and then
3:50
cut along the pencil lines that we made
3:53
basically cutting all four corners like
3:57
this
4:00
you can draw the lines again on the
4:03
second piece this just saves
4:11
time okay so once you have that
4:15
cut these are going to be the two pieces
4:18
of our hexagon base you can now start to
4:21
see how the hexagon looks so now Let's
4:25
Fold on all the score lines
4:30
fold them all in the same direction and
4:32
burnish them with your bone folder or
4:34
your finger just to make sure they're
4:36
nice and crisp and
4:41
straight so let's fold them all okay so
4:47
these are the two parts of our hexagon
4:49
base this is how it's going to look and
4:53
be attached
4:56
together and I promise you it will make
4:59
sense at
5:00
end okay so now let's open the hexagon
5:04
piece and we are going
5:08
to make a
5:11
mark on
5:13
the or not make a mark cut
5:16
out a
5:18
slit we're going to do
5:22
that in the space between the bottom
5:27
and the second the first and the second
5:30
score lines about half an inch slit just
5:34
make it
5:37
wider like
5:40
this so it is in
5:43
between the first and second score line
5:48
in the center a line between the two
5:50
score lines and in the center between
5:53
the edges about half an
5:56
inch long slit that you're going going
5:59
to cut out this is where we're going to
6:05
insert our standing embellishments so to
6:12
speak okay so
6:15
next remember our strips Let's Fold on
6:19
the score lines that we did on the
6:21
strips as
6:27
well so
6:30
let's do
6:31
that going to fold on all the
6:42
lines now we're going to
6:49
create a t to
6:53
insert inside that little slit
6:59
so first let's
7:05
attach the
7:06
strips
7:08
to
7:10
the
7:12
hexagon so you're going to apply glue to
7:14
that little onein Tab and attach it to
7:17
the center of the strip this is going to
7:20
be what's going around the base the
7:23
outline frame so to
7:26
speak and make sure
7:30
not to attach it to the side where the
7:32
slit is so the other side the other
7:37
tab make sure that the little tab on the
7:40
Strip is on the right side when you
7:42
attach
7:44
it basically you attach it the same way
7:47
to both hexagon
7:51
shapes and that score line needs to meet
7:57
this score line and be aligned with it
8:01
so now let's go to our T's we're going
8:04
to create little T's with strips of
8:10
paper we're going to score
8:13
the long strip at one it's sorry at half
8:17
an inch score the long strip at half an
8:22
inch and then attach the other part of
8:26
the te like this aligning it with
8:31
the other
8:32
strip so you're going to make two of
8:38
those two
8:42
T's now we're going to attach the t's to
8:45
our
8:48
bases so you need to follow me and see
8:51
how it's going to be
8:53
made so we're going
8:56
to attach
9:00
this is how it's going to look so this
9:01
is going to be closed and the t is going
9:03
to be inserted inside that
9:06
slit so now insert the T inside the slit
9:10
all the way
9:12
down apply
9:14
glue to the edge to the bottom edge of
9:17
the te well it's completely
9:22
down and straight make sure it is
9:27
straight and then close close the card
9:30
like this to secure make sure it is dry
9:33
before you try to move
9:36
it don't being patient like me see
9:40
doesn't work if it's not dry now when
9:43
it's
9:45
dry you see the te is standing this is
9:48
going to be what we're going to attach
9:51
embellishments
9:53
to so now you can apply glue to the
9:56
little tab on the hexagon
10:00
and
10:01
close the
10:04
card like
10:06
this aligning the strip with the edge of
10:10
the
10:13
hexagon so this is one side of the
10:16
hexagon remember we have two sides so
10:19
we're going to do the exact same
10:22
thing this is going to be the other side
10:25
right so we're going to insert the T all
10:29
all the way
10:30
down like we did
10:33
before and then apply glue to the bottom
10:36
of the leg of the te and then close the
10:39
C to
10:41
secure make sure it is all the way down
10:43
and it is
10:45
straight then of course wait until it's
10:51
dry then close the hexagon apply or the
10:54
half a hexagon apply glue to that little
10:58
1 in Tab and close with the strip
11:02
attaching them together so now we have
11:05
both sides of the
11:06
hexagon with the little T's
11:10
attached now the third T is going to go
11:13
in
11:15
between the two hexagons like
11:18
this so we're going to apply
11:24
glue on both sides of the leg and then
11:28
attach it in the center when only the
11:32
horizontal part of the
11:35
T
11:37
is higher than the
11:40
hexagon and then we attach both
11:43
hexagons or half
11:46
hexagons
11:48
together to create one complete
11:53
hexagon and that tea is sandwiched
11:56
between them
11:59
just close
12:02
it just to
12:04
secure and this is how it looks when you
12:07
open it so now all we need to do is
12:11
close the strips around the base to
12:14
close the hexagon
12:17
box just moving it to make sure that it
12:20
is all
12:22
aligned now apply glue to the 1in tab to
12:27
close
12:30
to attach the two strips together and
12:33
we're going to do the exact same thing
12:34
on the other
12:39
side and now we basically have our
12:44
hexagon popup
12:46
box built now all we need to do is add
12:50
the embellishments and the cover paper
12:51
if there is something you need to cut
12:53
out if it's a little maybe too long
12:56
there's an excess just remove it
12:59
so when you open it like
13:02
this this is how your box looks no
13:05
embellishments yet but this is how you
13:08
operate it you push it inside to fold
13:13
it just making sure that it everything
13:17
works
13:19
perfectly this is how it looks when it's
13:21
folded and then you push it from with
13:23
your fingers from the
13:25
bottom to make it
13:28
pop so I've cut all kinds of
13:31
embellishments and cover papers again
13:33
you have all the measurements in The
13:34
Cutting guide in the description under
13:36
the video so I'm going to first cover my
13:40
strips
13:42
with the cover paper pieces we don't
13:46
need to cover the bottom because that is
13:49
get pushed inside and you won't see this
13:53
part so you can play with colors and
13:57
patterns at this point
14:01
and then make sure you have all your
14:05
cutouts your embellishments ready we're
14:09
going to attach them to our
14:12
te's remember we have three of those
14:15
popping out like
14:19
this so now we can go ahead and
14:23
attach the embellishments that we cut
14:26
out and see where we're going to put
14:29
them in what
14:34
height so I'm going to apply glue when
14:38
you apply the glue apply the glue only
14:41
to the bottom of
14:43
your embellishment because you're only
14:47
going to attach it to the tea you don't
14:49
want any
14:51
glue attaching it to the other parts of
14:55
the card by mistake
15:01
I'm just cutting out some more
15:04
embellishments so the
15:07
first going to attach first the front T
15:11
so that's my statement
15:16
there making sure it is
15:19
secure and then I'm going to keep
15:22
attaching my embellishments to the other
15:26
T's I like to First apply the glue to
15:30
the tea and then attach the
15:31
embellishments and not the other way
15:33
around but you can do that if you
15:38
want I encourage you to subscribe to my
15:41
channel and click on the little bell
15:42
icon to be notified when I upload a new
15:44
video so you won't miss anything and
15:45
you'll be able to follow all the
15:47
tutorials and make all the
15:49
projects also don't forget to join this
15:53
is how it looks Isn't that
15:56
cool the embellishments are bigger as
15:59
you go towards the back and what I
16:02
wanted to say is that you can check out
16:04
how to increase your chances of winning
16:06
the giveaway in the description under
16:09
the video really hope you like this card
16:11
it turned out really cool thank you very
16:14
much for joining me and I will see you
#Events & Listings
#Crafts
#Gifts & Special Event Items
#Greeting Cards
#Sweepstakes & Promotional Giveaways