0:05
hi everyone in at kler here with a new
0:07
video tutorial and I have some news for
0:18
you I can't believe it the 12 cards of
0:24
celebrating its 10th anniversary and
0:27
we're celebrating together with you with
0:30
a never seen before amazing giveaway
0:33
this ultimate giveaway will have 12
0:36
different winners each of them will
0:39
choose their own prize Yes you heard me
0:42
so check out all the details how to join
0:46
below so so so exciting so welcome to
0:51
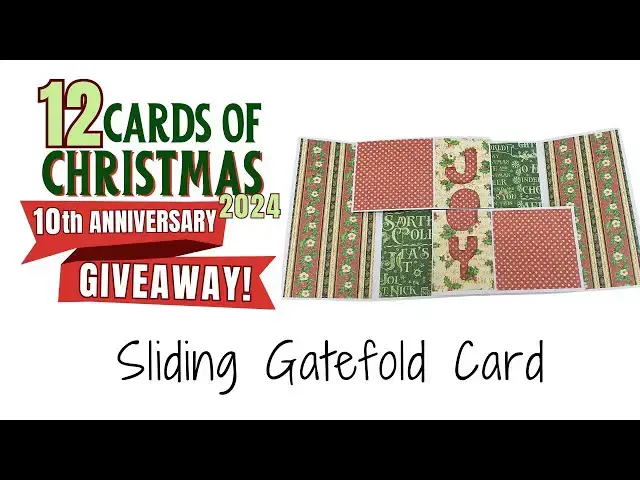
the 12 cards of Christmas Series today
0:53
we are making the sliding gatefold card
0:56
as usual you have a link to all the
0:58
measurements in the description under
1:00
the video you can go ahead and download
1:02
it so you can pre-cut all your pieces to
1:04
make this card so we're going to start
1:06
with the base and we're going to score
1:08
it at 2 and 1/2 and 7 and
1:12
1/2 this is the sliding gate fold card
1:16
and we are scoring on the long side at 2
1:22
1/2 then we're going to fold the score
1:26
lines in the same direction so basically
1:29
basically we're creating the gate fold
1:38
to create the mechanism but first we're
1:43
going to cover the gate fold with our
1:47
papers again you have a link to the all
1:50
the measurements in the description
1:54
video so I'm covering the
1:58
inside because we need to glue things on
2:01
it and after that it will be a
2:05
problem to cover to add the cover
2:11
paper also covering the inside and the
2:14
outside of the gate fold sides of the
2:21
card I can use any paper that you have
2:33
and I always like to use liquid glue
2:37
because this way I can
2:39
always make sure that I have the paper
2:42
in the right position I can wiggle it I
2:45
can move it before the glue dries when
2:50
use dry glue like double-sided tape then
2:54
once you attach it you attach it and if
2:58
straight then it's a problem and I never
3:03
managed to get it straight the first
3:04
time this is why I like to use liquid
3:07
glue but of course you can use whatever
3:09
glue you feel comfortable
3:13
with and that will be great okay so once
3:17
we have covered the base we can go ahead
3:22
and bring our second piece and score
3:31
aside okay so for this piece we're going
3:35
to score it at 3 and a/4 on the long
3:40
side 3 and 1/4 4 and 1/8 and 4 and
3:47
7/8 so 3 and 1/4 4 and 1/8 and 4 and
3:58
7/8 and then we're going to going to do
4:00
the exact same thing with the second
4:24
okay next we're going to fold on our
4:32
fold them all in the same
4:37
direction so you get something like this
4:40
and both shapes will obviously be
4:43
identical and we're going to attach them
4:49
base to create the sliding
4:53
effect okay so how are we going to
4:55
attach it on one side we have one tab on
4:59
two on the other side we have two tabs
5:02
so we apply glue on the side that has
5:06
Tab and then we're going to align it
5:09
with the fold line with the score line
5:11
and close the right side like
5:15
this and this will attach it about I'm
5:18
attaching it about a/4 of an inch from
5:22
bottom and then we're going to apply
5:37
the outside fold it and then attach it
5:41
to the base of the card we're going to
5:44
do the exact same thing with the other
5:46
side so first on the one on the side
5:50
that has only one tab we're going to
5:53
align it with the fold line about4 of an
5:55
inch maybe a little bit more from the
5:57
top and close the left side
6:01
side and then we are going to apply glue
6:08
this fold it down and attach it to our
6:16
card now let's attach the panels we're
6:20
going to apply glue only on the on the
6:25
left side of the score line so not on
6:30
that small tab on the right only from
6:32
the score line to the
6:35
left and then attach the panel aligning
6:38
it with the left side with the left Edge
6:41
like this and the top
6:44
Edge so remember on that small panel on
6:48
the right there is no glue and on the
6:51
bottom we're going to apply glue from
6:53
the score line to the right not on the
6:57
tab that is from the left of the the
6:59
score line and we're going to align
7:11
bottom and the fold line on the left we
7:15
always align it with the fold
7:18
lines and now when we close and open it
7:22
we're going to get that sliding
7:25
effect wait until it's dry and then you
7:28
see when you close it it and open it it
7:32
works now bring your cover papers
7:37
and attach first the small cover papers
7:41
I'm going to create that effect where
7:44
the two panels join to create a word
7:47
when you open the card so first I want
7:52
smaller cover papers attach the top one
7:57
aligned to the right and the bottom one
8:02
left and then I'm going to add the other
8:08
papers to completely cover the
8:13
panels and then you can add letter
8:17
stickers or you can write it by hand or
8:23
letters to just spell the word that you
8:27
want I think that Joy fits here
8:31
l so I'm going to cut it out
8:35
freehand you can use a deut
8:38
machine or if you have ready made
8:45
can use whatever you want just make sure
8:51
bottom letters are complete and then the
8:55
inside letter the O if you use the word
8:58
Joy the o has to be cut in half because
9:02
one half is going to be attached to the
9:04
top panel and the other half is going to
9:07
be attached to the bottom panel you can
9:10
also use something like a an image if
9:13
you don't want to have writing and then
9:15
if you use like an image or a panel or
9:19
that then you need to cut it in half in
9:22
middle and attach the top part to the
9:25
top panel and the bottom part to the
9:27
bottom panel I hope that makes sense
9:30
so I have my J my o and I'm going to cut
9:37
y I'm just going to freehand it I'm
9:43
okay but again you can even print
9:46
letters from your computer and Trace
9:49
them onto a piece of card stock if you
9:54
have stickers or D Cuts
9:57
or cutouts or something something like
10:03
that okay so now I have all my letters
10:06
and I can go ahead and attach
10:17
place just making sure they look pretty
10:27
looks just make making that y a little
10:35
even this is the fussy cutting cutter in
10:38
me that has to have everything
10:42
perfect but that's just
10:46
me I need everything to be symmetrical
10:50
and okay so now it looks
10:53
better so I'm going to attach my letters
10:59
after inking the edges the inking of the
11:01
edges creates that border because I have
11:05
two slightly noisy patterns so I need to
11:10
create some separation between the two
11:12
patterns and that is what the inking
11:17
does creat sort of a black line around
11:21
the letters that makes them pop out
11:25
and looks better at least that's what I
11:27
think of course you can mat the letters
11:31
on a darker card stock and then cut
11:35
again I don't bother so first I want to
11:38
attach my two parts of O and then so
11:42
they will be in the center and then
11:44
align the J and the Y
11:48
accordingly so in the meantime let me
11:51
remind you to subscribe to my channel
11:53
and click on the little bell icon to be
11:55
notified when I upload a new video so
11:57
you won't miss anything and you'll be
11:58
able to make all the projects including
12:00
all the cards and don't forget to join
12:04
our amazing giveaway for the 10th
12:07
anniversary of this series you can find
12:10
out all the details how to join in the
12:12
description under the video including
12:15
how to increase your chances to win
12:18
increase them by at least
12:21
12% or 12old anyway increase them by a
12:25
lot find out how go to the description
12:28
under under the video so thank you very
12:31
much for joining me and I will see you