live_tv
Livestream Starting Soon
00
Hours
:
00
Minutes
:
00
Seconds
Up next in 10

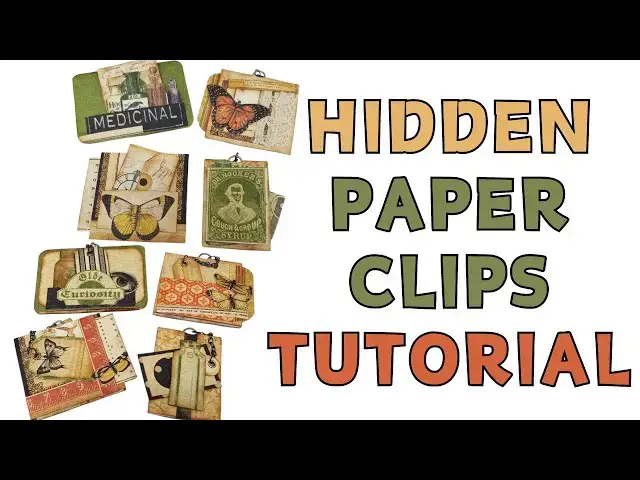
Use your paper scraps to make hidden paper clips to add to scrapbook pages, junk journals and more
Join this channel to get access to perks:
https://www.youtube.com/channel/UCPdD0ifkS1vKYPs3zgDx3YQ/join
Show More Show Less View Video Transcript
0:01
[Music]
0:15
hi everyone Ana kler here with a new
0:17
video tutorial and today I want to show
0:19
you how to make Hidden Clips these are
0:23
really cute DIY paper projects that you
0:26
can make from your scraps so I've taken
0:29
out my
0:30
scrapbook paper scraps these are graphic
0:34
45's different bits and pieces that I
0:37
have left and I want to show you how to
0:40
make them
0:42
into really cute DIY paper
0:46
embellishments that you can add to your
0:48
junk journals to your scrapbook pages
0:51
mini albums whatever so what you're
0:54
going to need is just a plain piece of
0:56
paper we're going to fold it in half I'm
0:59
using a large paper clips they're 2 in
1:02
then we're going to insert the clip to
1:05
the folded paper the job of the folding
1:09
paper is basically to be an extension of
1:12
the
1:14
clip this is where we're going to insert
1:16
our tag or page or whatever and we want
1:20
it not to search for the clip so the
1:23
paper is basically the large clip so I'm
1:27
going to take another piece of double
1:30
the card sto fold it in half and then
1:32
really punch the very very edge to
1:36
create a tiny little hole I'm using a
1:39
half in punch and we're going to insert
1:42
the top of the paper clip
1:45
inside the
1:48
paper the double-sided card
1:51
stock and then we'll have that
1:54
little part of the clip popping out of
1:58
the paper now we're going to glue the
2:02
two
2:05
papers doesn't really matter now if
2:07
you're not to size we're going to cut
2:09
everything later first we need to glue
2:13
it we're going to glue one
2:20
side and then we're going to flip it and
2:22
glue the other side now you can make
2:24
them as large or as small as you want
2:27
you can add lots and lots of
2:29
embellishment ments on them they're
2:32
really
2:33
cute they're really
2:36
fun they really make a great addition to
2:39
any paper project that you
2:43
make so let's glue that and that top
2:46
piece of the clip we're going to attach
2:49
a chain to it and create
2:53
dangles from there so that's going to be
2:56
really really fun so once I have
2:58
everything glued down I can take my
3:00
scissors and trim it down to the size
3:03
that I want
3:05
my paper clip to
3:08
be the only thing that you need
3:12
to consider or to take into account is
3:16
the length of the paper clip so you
3:19
don't want to make it the paper too
3:21
short because you don't want the clip to
3:24
pop out of the end
3:29
and then another thing you need to do is
3:32
pick out the front where you want your
3:35
front to be and then trim it down a
3:38
little bit so we'll get that difference
3:42
between the front and the
3:43
back that will make it a lot easier for
3:46
us to insert
3:48
it like
3:50
this because you'll see where to insert
3:55
the the clip it
3:57
won't when the edges are are the same
4:01
size it's really hard to know where one
4:03
starts and the other ends and it's
4:05
really hard to insert that tag or page
4:08
in between
4:10
them so I'm going to give them all sort
4:13
of a aged vintage look so I'm going
4:17
to ink all my edges this is a distress
4:21
ink I'm using the photo vintage
4:24
color and then once I have the
4:27
base also going to to Ink that piece
4:32
that is slightly
4:34
longer and now it's time to embellish
4:38
all the the front and the back remember
4:41
the paper clip has two
4:44
sides so you want to embellish the front
4:46
and the back so I'm just going to make a
4:48
little
4:50
Tab and this is such a great way to use
4:54
all your leftover papers and scraps
4:59
don't know how many scraps you have I
5:03
don't know what size of scraps you keep
5:06
but you can really make fun things
5:09
with very small pieces so I almost never
5:12
throw out
5:14
anything and the fun part is that you
5:17
can even make pockets and interactive
5:19
elements to add to your paper
5:23
clip so I'm just going to cut out a
5:27
butterfly and I'm thinking
5:30
how I'm going to assemble that so this
5:32
piece is going to be a pocket so I just
5:34
apply glue to three sides you know how
5:37
to make a pocket
5:40
right and
5:42
then the
5:43
pocket is glued down with
5:48
this pretty
5:51
butterfly just going to add a line of
5:53
text this is again it's all from the
5:55
paper scraps that I have
6:02
so I'm just going to add
6:06
that see I'm just using that side of
6:09
paper to create a little
6:16
tag I'm going to make a hole in the
6:20
tag if you have a punch you can use a
6:22
punch to create little tags and that tag
6:25
I'm just going
6:28
to of course ink it I'm going to punch a
6:32
hole in it and
6:33
then connect it to a chain and that
6:37
chain is going to dangle from that paper
6:40
clip piece that is popping out so now I
6:44
have a
6:46
hole I'm going to put an eyelid in the
6:50
hole it's always a good idea if you want
6:53
to hang a chain it won't rip the paper
6:59
and I'm using my crocodile and for such
7:02
a little tiny punch you need
7:06
the uh forgot the number I think it's
7:09
number
7:12
four for whoever has
7:15
a
7:17
crocodile now let's bring a chain and
7:20
we're going to connect the
7:22
chain to
7:24
both the tag and
7:29
the paper clip first just going to take
7:32
a jump
7:35
ring sometimes I use my finger sometimes
7:37
I use another
7:40
tool
7:42
whatever you feel comfortable
7:45
with so first I want to attach the chain
7:50
to the paper clip so then I'll be able
7:53
to figure out how long I want it to
7:56
be with the tag attached to it
8:01
it so I'll need another jump ring to
8:05
insert to the
8:13
tag and then I'll be able to see how
8:16
long of a chain I
8:20
need so I want it to dangle but I don't
8:23
want it to be too
8:27
long so this looks like a good size good
8:32
length let's cut it
8:38
out so now I can go ahead and attach it
8:41
to the tag so that is really really fun
8:46
isn't that fun I love those dangling
8:52
things you can write something on it if
8:54
you
8:55
want so now we can go ahead and work on
8:58
our other side and this is basically how
9:01
I make all my tags my sorry my paper
9:06
clip just added a little another
9:10
butterfly to the front so this is how I
9:13
make all my hidden paper clips
9:18
and you can make them of course from any
9:20
paper that you want to match it to your
9:23
project you can have like a
9:27
stash sit down one day make a few and
9:31
then see
9:33
how you can add them to whatever project
9:36
that you want just play around with them
9:39
so I have another
9:42
butterfly which of course everything has
9:45
to be
9:49
Inked and then I'm also going to add a
9:52
little piece of lace if you have
9:55
leftover pieces of fabric ribbons laces
9:59
they can also look really pretty on
10:02
those hidden paper
10:06
clips so I'm just going to add
10:09
that so we're going to add all
10:13
that to
10:16
our other side of the paper
10:24
clip I think it looks pretty good
10:29
am I going to add something on the top
10:32
yes so even a piece like
10:36
this which is
10:39
definitely doesn't look
10:42
much if you cut it out it can still be
10:46
added to something as a as a
10:51
detail so sometimes you need to look at
10:53
your scraps as Treasures because even
10:56
something like this can really add to
11:00
your
11:01
overall
11:03
collage creation this is sort of a
11:06
collage what we're making here because
11:08
we're taking pieces and combining them
11:10
to
11:12
one that looks really
11:15
good and I love this dangly tag in the
11:20
pocket so this is our first paper clip
11:24
let's make another
11:26
one let's go green this time
11:31
time so we're going to fold our paper
11:34
and then fold the double-sided card
11:38
stock actually don't really have to use
11:40
a double-sided card stock because the
11:42
inside does not show so you can just
11:45
use a plain card
11:49
stock and punch the hole that
11:53
will be for the paper clip
12:00
so let's insert our paperclip and then
12:04
attach both sides of the card
12:10
stock just going slightly faster here
12:13
because you already know the basic idea
12:17
you got the technique so now it's just
12:20
having some more ideas fun ideas to
12:23
create those
12:29
paper clips so I'm going to leave this
12:32
quite big I like the size this is maybe
12:35
just trim it down a little bit on the
12:42
bottom this one I really like that it is
12:51
big no just going to trim it in the
12:55
bottom and then don't forget to make the
12:58
front slight shorter than the back and
13:01
I'm also going
13:02
[Music]
13:05
to round the edges on this
13:10
one these little details give them a
13:13
really good
13:19
finish when the punch doesn't work use
13:22
your
13:23
scissors okay so I've already Inked the
13:27
edges
13:29
so now I want to add all my little
13:34
scraps
13:37
another layer to the front
13:45
here then we're going to have another
13:49
pocket those pockets are really
13:52
fun so this was a
13:54
frame from a tag that I
13:57
removed I like the
14:00
shape so this one will go
14:05
here and we're going to attach those two
14:08
pieces together to create
14:12
the pocket
14:14
basically I look like this
14:18
eye kind of
14:21
creepy so all that is going to be a
14:23
pocket so I only add the glue on three
14:27
sides leaving the top without any glue
14:30
so I can
14:37
add things under it so I this piece was
14:40
too small so I glue two pieces together
14:42
to create a little
14:46
tag again no scrap is too
14:52
small it's around the edges
14:56
here and that will be a fun tag
15:04
so we need to make a hole in the
15:07
tag and attach a chain to
15:10
it I want this bottle to be in the
15:18
background so that will be glued I'm not
15:20
going to use that as an insert for my
15:22
pocket this is just going to be another
15:24
embellishments
15:27
here okay so now I can go ahead punch a
15:31
hole in my tag and add my
15:36
chain also going to
15:38
add an eyelid for this
15:42
hole always really good
15:49
idea and then let's bring in the jump
15:53
rings and the chain and we can go ahead
15:59
attach
16:01
that okay so now we have our tag
16:06
attached let's see how it turned out
16:08
sorry I'm off camera here
16:11
okay oh I like
16:14
it so let's make another pocket on the
16:18
other
16:21
side just attaching these bottles to the
16:24
word this is all from scraps
16:30
and let's make another pocket
16:34
here and since it's had the the
16:37
medicinal and the bottles have such a
16:39
like a pharmacy Vibe let's
16:44
create a little let's say subscription
16:48
pad or book or something even that
16:50
little scrap
16:52
piece add
16:54
something hope you get the idea about
16:56
using scraps already
16:59
so this one is going to be like
17:01
a
17:06
pad so I'm just going to Ink the edges
17:09
and then I'm just going to use my staple
17:12
stapler
17:14
sorry to connect some plain white papers
17:21
to the back to create sort of a little
17:25
tiny notepad or notebook or whatever
17:31
so first I want to attach them and then
17:33
I'm just going to cut
17:40
around so now I'm also going to add a
17:43
little bit of
17:44
ink to the white papers cuz they're too
17:48
white so that's
17:52
fun that's not straight
18:03
just a little tiny bit of
18:08
inking and some of the pages not
18:15
everything okay so like this pad is now
18:18
ready isn't that fun so we have our
18:23
second hidden paperclip tag
18:26
ready let's see how it looks
18:30
looks and you insert it on something
18:32
Isn't that
18:34
cool I really like that so I have made
18:38
two
18:41
more just going to show you how they
18:44
look you can go ahead and make as many
18:46
as you
18:47
want please don't forget to subscribe to
18:50
my channel and click on the little bell
18:51
icon to be notified when I upload a new
18:53
video so you won't miss anything and
18:55
you'll be able to follow all the
18:57
tutorials and make all the projects
18:59
so this is the one that we
19:02
made with
19:04
the paper pad this is the first one that
19:08
we made really like how this one turns
19:15
out these are both sides and then the
19:18
other two I made this one has another
19:21
side pocket to it and this one is with
19:26
this triple insert
19:31
and then the last one has a really cute
19:34
belly band and flap with a pocket
19:40
here so I really hope you like this
19:43
tutorial thank you very much for joining
19:46
me I'm going to find a place for
19:50
these in my junk Journal by the way you
19:55
have I'm going to put a link here for
19:58
the junk Journal tutorial you have that
20:01
too if you want to make
20:04
it so thank you very much for joining me
20:07
and I will see you next
20:27
time e
#Crafts
#Document & Printing Services
#Art & Craft Supplies