Inside: what is paper quilling and how to make it
Quilling is one of the most easy to do crafts which has one of the most beautiful effects. Paper is a versatile materials but in quelling it definitely has the most striking look compared to the simplicity of its preparation.
WHAT IS QUILLING?
Quilling or paper rolling is an art form that involves the use of strips of paper that are rolled, shaped, and glued together to create decorative designs. The paper is rolled, looped, curled, twisted, and otherwise manipulated to create shapes that make up designs to decorate greetings cards, pictures, boxes, and to make models, jewelry, mobiles, etc.
It starts with rolling a strip of paper into a coil and then pinching the coil into shapes that can be glued together. There are advanced techniques and different sized paper that are used to create 3D miniatures, abstract art, flowers, and portraits among many things.
THE HISTORY OF PAPER ROLLING
The origins of this artwork are not known. Some people believe that quilling started in China after the invention of paper, and others think the craft had its origins in the 13th century. Nuns would imitate the iron decoration that was used as metal ornamentation in home decor. They would roll strips of gilded paper cut from books. Then they used the paper filigree designs to decorate books and religious objects.
WHAT TOOLS DO YOU NEED?
Beginner quilling maker can work with only strips of paper, a toothpick, knitting needle or similar object, and some glue.
If you want more professional tools you will need:
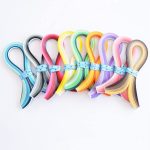
Paper Quilling Strips: precut paper designed especially for quilling can be bought online or at your local craft store. The advantage of using pre-cut paper is that your paper strips will always be the same width and of course you will also save time when using this type of paper.
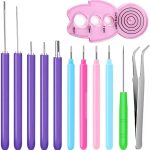
Slotted Tool: this tool is a handle with a comfort grip that has a slotted metal piece at the top to insert your paper strips and then twists them into circular shapes. This tool makes it easier to control and roll your paper strips.
Tweezers: tweezers are handy for holding your quilled shapes together while you are applying glue.
Needle Tool: the needle tool is a handle with a comfort grip that has a needle on one end. This tool is useful for applying glue to the ends of your paper strips.
Circle Sized Ruler: this handy tool is a ruler that has various sized holes in the middle. Place your rolled paper coil into a hole and get an accurate measurement.
BASIC SHAPES
There are a few basic shapes that you need to master before starting larger project. They are very easy to do.
It can be quite helpful to make a master page of basic paper quilling shapes.
Glue different shapes to a piece of cardboard to use as a reference sheet when working on various projects. The guide serves as both a reference and an inspiration source.
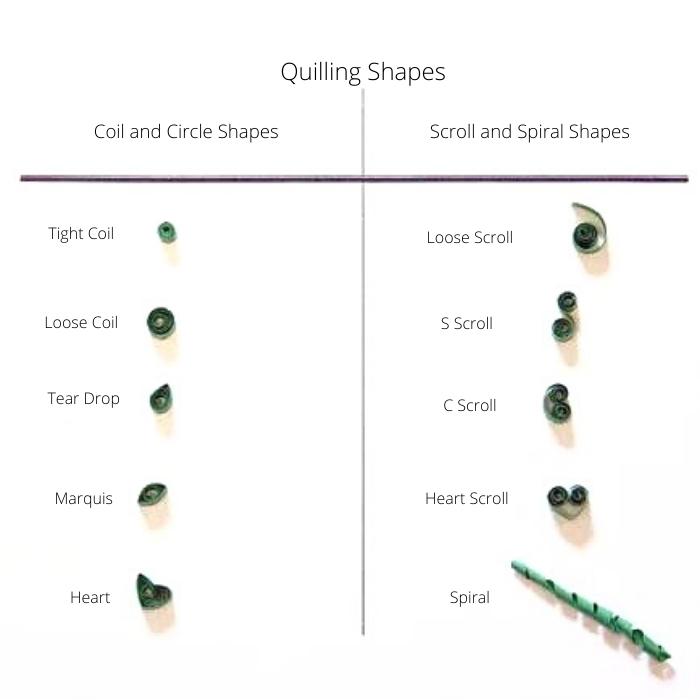
The most basic shape in quelling is a circle. Here's how to make it:
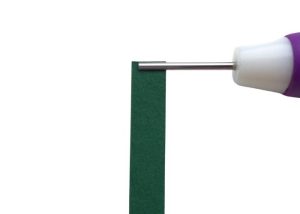
To begin, insert a piece of quilling paper into the slot of your quilling tool.
Roll the tool with your dominant hand. Hold the strip taught with your other hand.
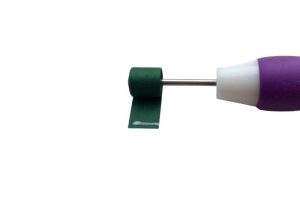
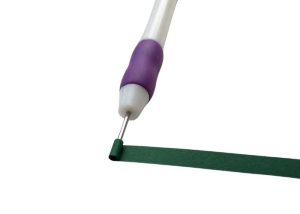
To make a closed coil, as you near the end of the strip, place a small amount of glue near the end of the strip and roll to complete. When you remove it from the tool, do not allow it to expand.
To make an open coil, remove the coil from the tool and allow the coil to expand. Once it has fully expanded, add the dab of glue and press the strip down carefully to secure.
You can find a complete tutorial for all quelling shapes HERE
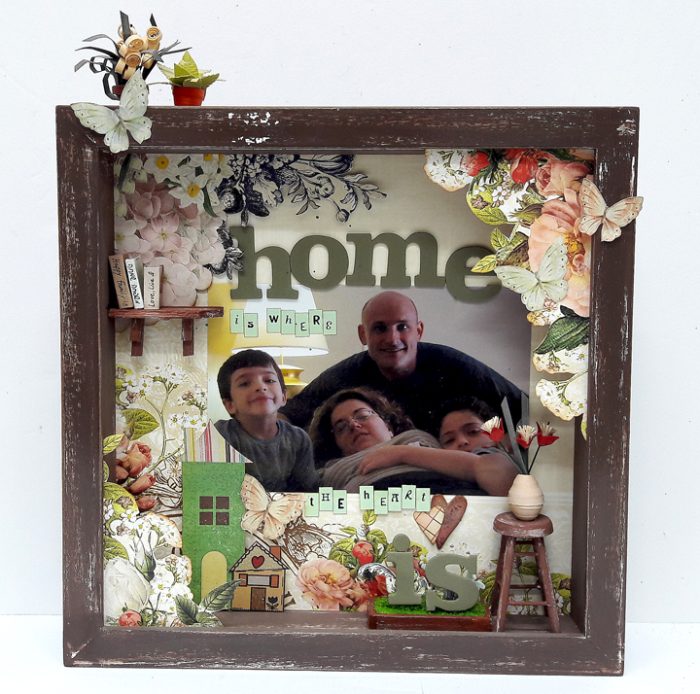
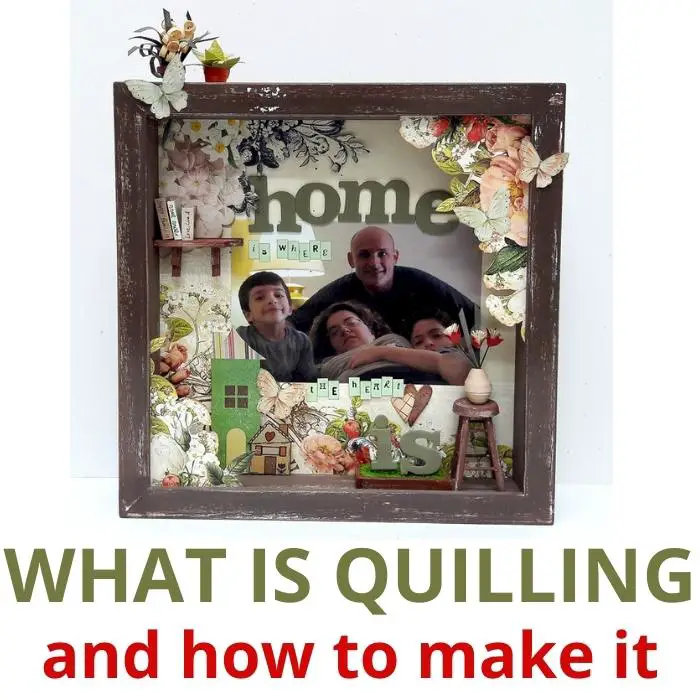
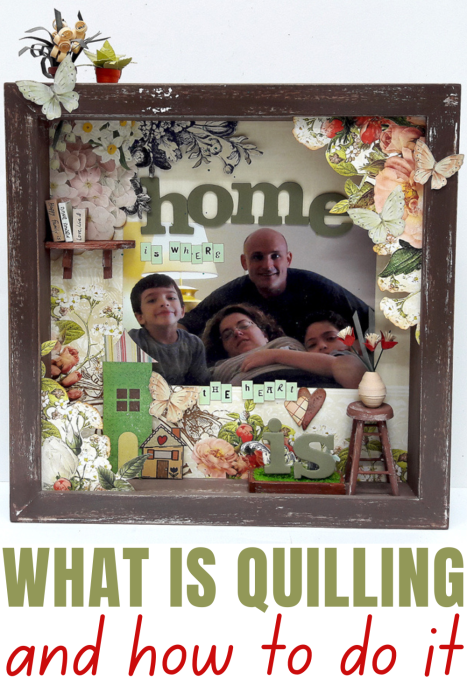
ALTERED FRAME WITH QUILLING
To make this project you will need a deep frame that you can add 3D quelling embellishments to. You can paint the frame in any color and even distress it a little like I did.
The next step is to create the details. First I cut all the large pieces of flowers, butterflies and the background. I layered them all on the inside of the frame and around it. To create dimension I added the flowers on the inside and outside of the frame. Then I added the photo (which is an old photo I couldn't develop again so it's not very sharp).
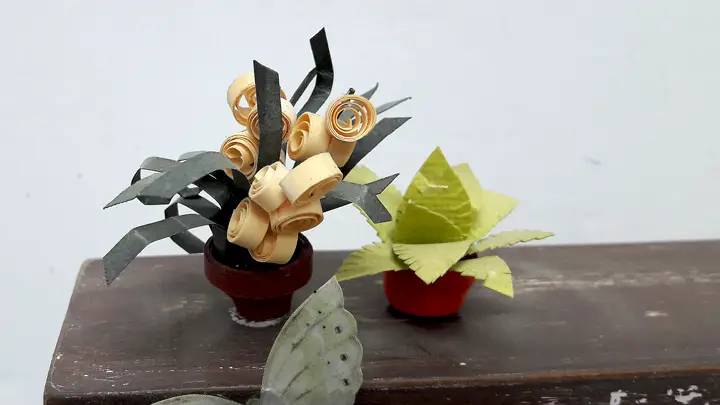
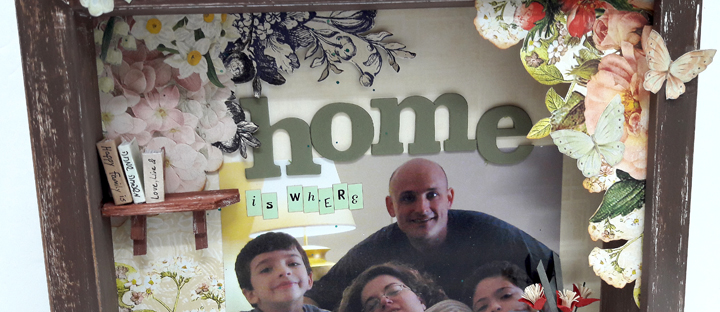
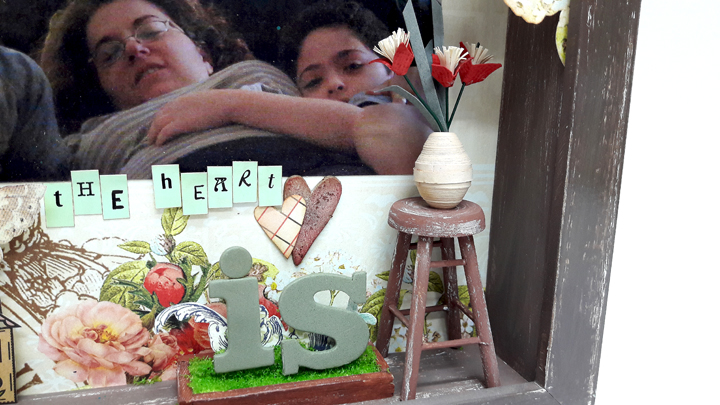
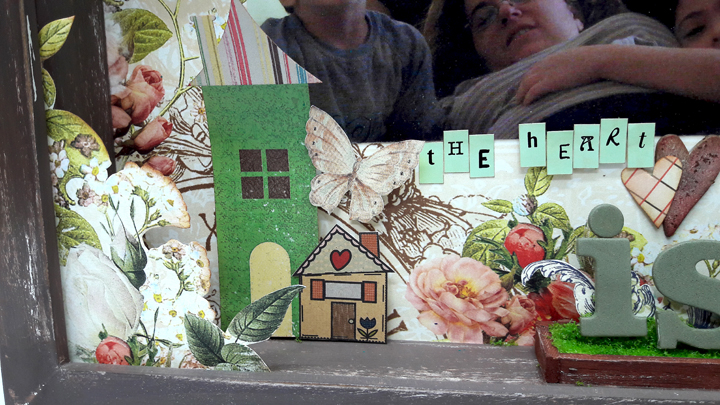
I added the different letters and houses I cut from paper. Then I created plant pots from quilling and attached them on the top of the frame. On the inside I added a flower vase on a wooden chair I painted and distressed.
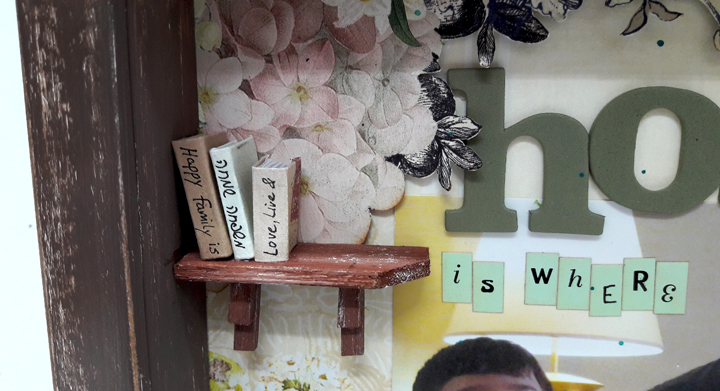
I created the shelf and the flower bed from the little pieces of wood you get when you buy a canvas. Then I cut them to size, built the shape I wanted and painted them. I made the grass with green Flower Soft . The little books on the shelf are pieces of regular paper folded into a book shape.
PAPER ROLLING SHAPES
All the flower pots are different quilling techniques. The different designs of flowers and leaves were glued inside the pot.
Flower Pots - push closed coil out gradually to make a 3D bowl shape.
Small circle flowers - glue loose coils to pieces of wire and strips of quilling paper as leaves.
Green Leaves - cut leaf shape paper on the edges.
Flower pot on chair - glue two pots together.
Flowers - cut wide quilling strip like grass on one side and then roll tight.
Looking for some more altered art project?
Here you can find some household items you can alter and make into beautiful art pieces. Like an old brush, empty match boxes, milk cartons and more.
Sharing is caring - PIN IT!
Have fun creating!


2 comments on “WHAT IS PAPER QUILLING AND HOW TO EASILY MAKE IT”
Great project!
Thanks dear!