Published on Prima

What a joy to see another one of my layouts on the prima blog. This layout is full of flowers and not just the kind that grows from the ground. This layout tells the story of two boys that just love to outdoors and watch the flowers bloom. Since I consider them to be my flowers I thought it was appropriate to combine the title with the photos. I used a fun technique on this layout. The photo seems to be embedded in the background paper because the tear in the paper goes on the photo too. The way to do that is to make a cut in the photo and insert the tearinto the photo. Cool, right? Have fun creating! Einat

Ins(paper)ation – Trees

“Keep a green tree in your heart and perhaps a singing bird will come”. Chinese Proverb My inspiration for this page was the paper itself. When I saw it I knew just the right photo to use. A photo I have been saving for a long time for the right paper. I just didn’t find the right kind of paper for it until I came across this beautiful wood print. This is another DT layout for My Punch’s Kit of the Month Club. I’ve added a transparent frame on the photo and created another “frame” from pieces of distressed papers that were placed under the photo. I’ve added the flags and buttons to insert a little bit of childish atmosphere to the layout. Don’t forget to enter your summer project to the Summer Contest!! Have fun creating! Einat

101 Flowers Tutorial #16: Duck Tape

Duck Tape? Yes, Duck Tape. In principal you can make a flower of almost any material you want, so why not duck tape? Now it comes in all kinds of colors and patterns  so it’s really fun and not expensive to work with and incorporate it in your projects. Here’s how it’s done: 1.       Cut a long strip of Duck tape. Fold it almost in half, leaving part of the tape’s sticky part exposed. 2.       Start rolling the Duck tape while wrinkling it. If the flower is not big enough you can add another strip and continue rolling and wrinkling. 3.       Add a bead, button or brad as a center. 4.       For a finishing touch add leaves. Have fun creating! Einat

You are mixed media mini album

I love paper. But sometimes it’s fun to play with other materials, like I did in this mini album. It has paper, cardboard, canvas all wrapped into one mini album with some cute and funny photos of my kids. The first page is made from corrugated cardboard. On the front I made the two colored background with a Vaseline resist technique. The other side is covered with patterned paper and torn to reveal the corrugated cardboard. The second page is a canvas with a mask background and a really fine cutting of a flower from a patterned paper. The other side is covered with paper with some funny hand writing. The next page is also canvas. The canvas side is stamped and misted. I also added some hand cut clouds. The other side is covered with paper with a handmade sun as a focal point. The last page has a mask and stamping on the canvas side and patterned paper …

One Sheet of Paper Tutorial: Mini Album

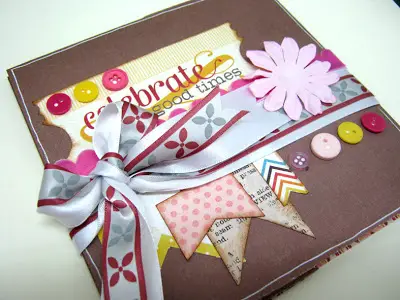
You know I love creating project from only one sheet of paper! Here is another fun and easy tutorial for The Robin’s Nest DT. This is a great way to create a project without using too many materials or money. All you need is: one sheet of cardstock, two ribbons and a few embellishments! You can visit The Robin’s Nest blog and website 1.       Fold a double sided cardstock in four. Open all folds. 2.       Start working on the upper right square. Cut the cardstock on the vertical fold line from the edge to the center. Widen the cut a little bit. 3.       Cut the cardstock on the horizontal fold line half way from the center towards the right. 4.       Fold the upper right square in half to the right. 5.       Cut the cardstock on the new fold line from the center half way to the top. 6.       Fold upward. 7.       Fold again to the right. 8.       Fold downward on …

Interactive Design Tutorial – Forest soccer

This layout has a really fun technique to it…a turning flap! The theme of the layout is soccer and I wanted to add something interactive to it to compliment the theme. Since we are talking about soccer I thought why not add a turning round flap that hides and reveals a hidden photo? This is really easy to make. 1.       Cut a circle from cardstock. Make sure that the diameter of the circle equals the combined height of two photos. For example if you use two 4″ by 6″ photos the diameter of the circle has to be 8″. 2.       Cut the circle in half. 3.       Adhere the two photos to your layout one above of the other. 4.       Attach the circle to the layout with a brad. The point of attachment should be between the two photos in the center. The brad will allow it to turn and you can reveal and hide the photos. This is another DT …

Designer Craft Connection – Summer Picnics

Hey dear friends! It’s the first Monday of the month and it’s time to go hoping with all the talented designers at the Designer Craft Connection. Our theme this month is summer picnics and I have a picnic layout with some fun techniques. Whenever we go on a picnic my son loves to bring a book and just sit down quietly and read. This time was no different! I’ve used some fun techniques in this layout: Creating a tree – if you want a tree but you don’t have one ready, simply make one yourself. Cut the tree from brown cardstock or paper and add leaves. The leaves can be anything you want or have: buttons, flowers, rub- ons etc. since I created this layout for My Punch’s Kit of the month Club I had to use what was available on the kit. Adding colors to letter stickers – I had some green AC stickers but I wanted to dim …

Einat Kessler

Welcome!


Hello crafty friends!
I'm Einat: creative professional,mixed media artist, scrapbook and paper designer, altering enthusiast and class instructor.
Click here to learn more about me and my creative journey

Contact me:
kessler054@gmail.com


Social Links


Newsletter Signup


Craft and Hobby Association


Copyright Information

Copyright


The designs, pictures and instructions listed on this blog are provided here for personal use only and may not be sold, reproduced or used for commercial or submission purposes in any form without my written permission.


Blog Archive