Inside: How to make a perpetual calendar to remember important dates
I have a problem remembering important dates... I'm great with people's faces but I can't remember their birthdays, anniversaries etc. It's embarrassing, I know... but it is what it is. So instead of fighting a loosing battle, I decided to make a perpetual calendar to help me remember. I could put the dates on my phone, but as a crafter I prefer the traditional, prettier way instead of having another reason to be glued to my phone... Lol Besides, after dropping my phone into the sea once, I've come to realize phones might not be the most dependable way 
It's that time of year again...the year closes and we need to get ready for the new year. That means organization! If you're like me and have problem remembering dates, or even if you're not like me and you want to be organized I have 3 DIY perpetual calendar ideas that you can make!
WHAT IS A PERPETUAL CALENDAR
The idea behind a perpetual calendar is that you only have months. It is not relevant for one year but for life. The calendar has a page or space for each month with numbers from 1-31. Because there are no days the calendar is relevant for every year.
You simply write the dates you need to remember on the relevant month, for example my mom’s birthday is August 15th, so I’ll write it on the August page. The dates don’t change so you’ll have them written down monthly and never forget!
THE ADVANTAGES
I think perpetual calendars are the best way to remember important dates because:
- The calendar never expires and is always relevant
- It's a great way to remember annual events and dates
- You don't need to change the calendar when the year changes and @move@ all the dates from the old calendar to the new one
- Adding new event dates is easy and you only need to do it once
- It can be a beautiful project for your desk or office
- It can be a great gift for some one else that can't remember dates...
THE DISADVANTAGES
As useful as a perpetual calendar is it had its disadvantages:
- It doesn't work for everyday one time events because there are no days on this calendar
- You can't use it to plan your day, week or month
- It's not for managing meetings, school events or reminders
DIY PERPETUAL CALENDAR IDEAS
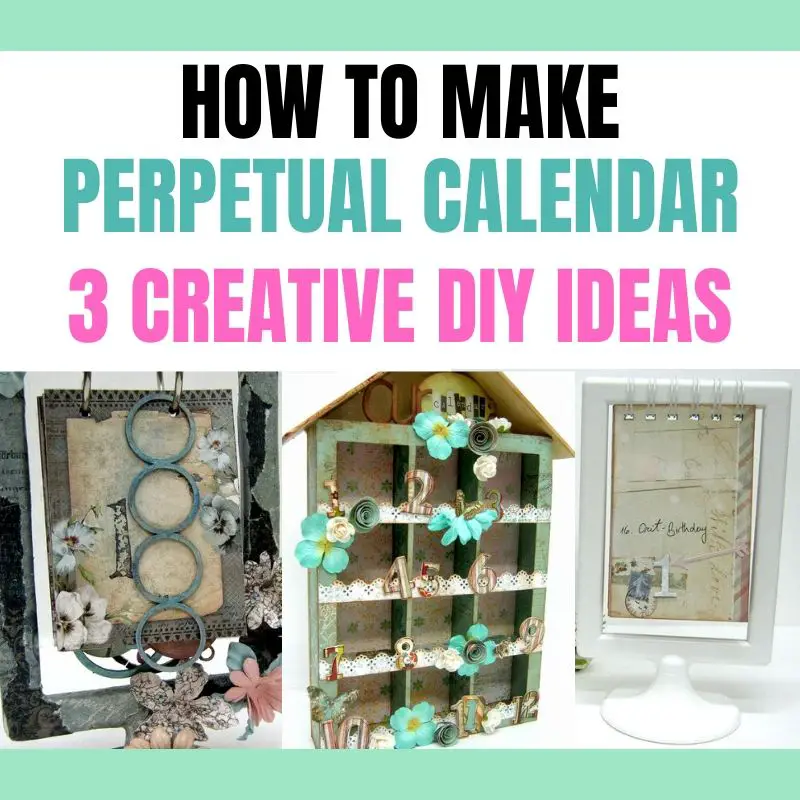
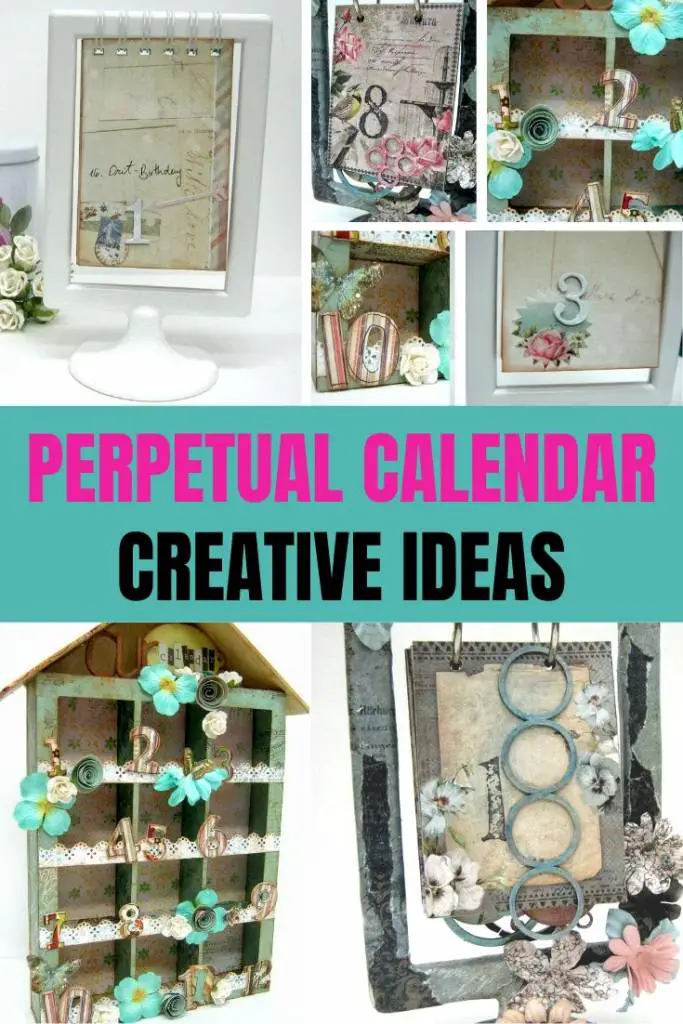
IKEA FRAME CALENDAR IDEA
I used an IKEA frame to create a hanged calendar with a page for each month. I kept the design clean and simple with a shabby chic look. Don’t forget you can’t overload the pages with lots of embellishments because you need to leave some space to write those dates!
You'll need:
- IKEA standing plastic frame
- Double sided pattern cardstock
- Chipboard or cutout numbers
- Distress ink
- Bind-it-All or other binding system
- Rings large enough to move freely around top edge of frame
BUILD THE CALENDAR
- Remove plastic and backing cardstock from frame
- Cut 12 rectangles measuring 3 1/2 x 5
- Make the holes for the binding
- Add months' numbers to the pages and 1-31 listed numbers. Don't add too many embellishments to the pages so you'll have room for writing
- Add distress ink around all pages
- Insert binding rings to pages and close the rings around the top part of the frame.
Watch the video tutorial to see how to make this calendar step by step
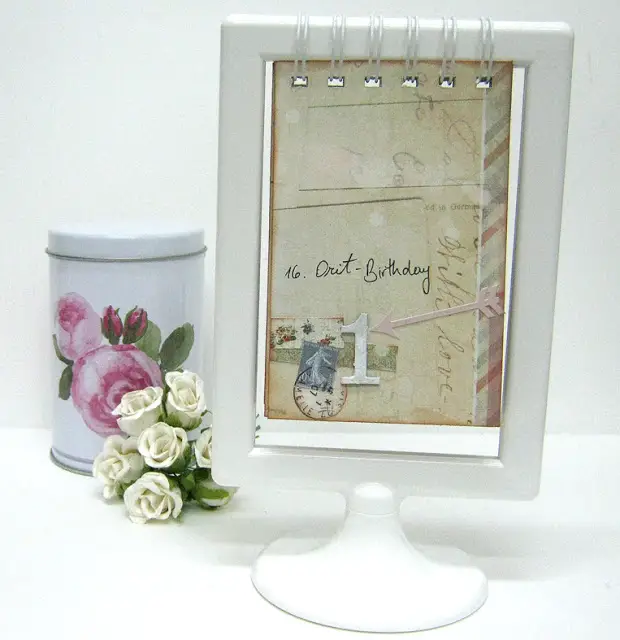
MIXED MEDIA ALTERED FRAME PERPETUAL CALENDAR
This calendar creating process is similar to the previous calendar however there are some mixed media techniques I added to the frame and pages.
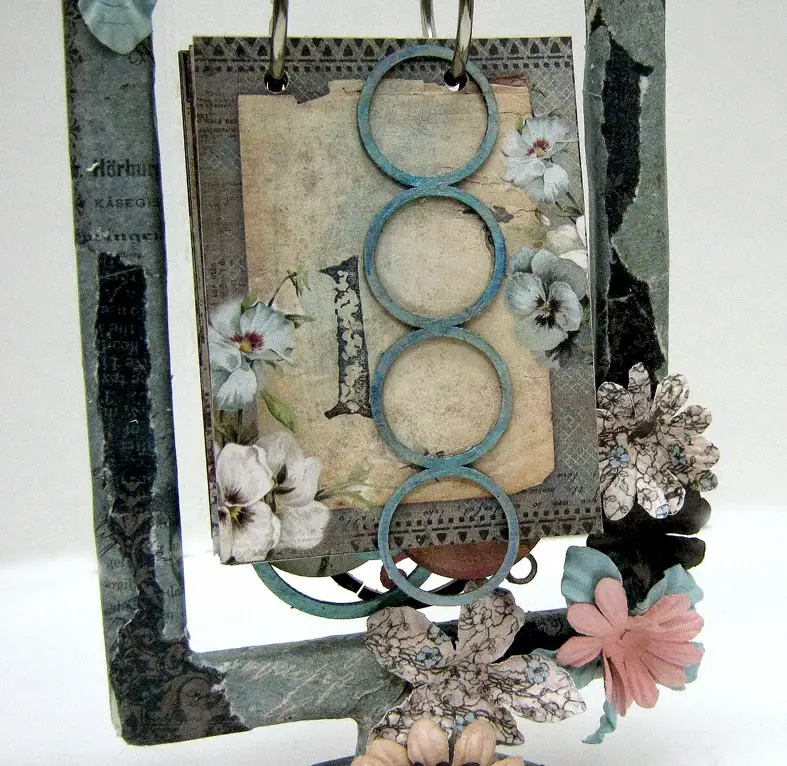
Supplies needed:
- IKEA standing plastic frame
- Double sided pattern cardstock
- Number stamps and permanent ink
- Flower embellishments
- Chipboard decorative shapes
- Aquarelle pencils
- Perfect pearls
- Gel medium
- Two large rings big enough to move freely around top edge of frame
- Water spritzer
HOW TO MAKE IT
- Cut the pages and stamp the month numbers
- Color chipboard pieces and attach to pages
- Make two holes on top of all pages
- Spritz a piece of cardstock and when it's wet rub the paper with your hand to remove layers of paper until the paper is very thin like tissue paper
- Repeat with enough pieces to cover frame
- Attach paper pieces to the frame with gel medium
- Insert rings and close around tip of frame
HANGING HOUSE CALENDAR
This project is a 3D house built from chipboard and has a different system of keeping your important dates. Each month has a little “room” in the house and in it a card or cards with important dates like mom’s birthday or grandparents’ anniversary, regardless of the day in the week or month.
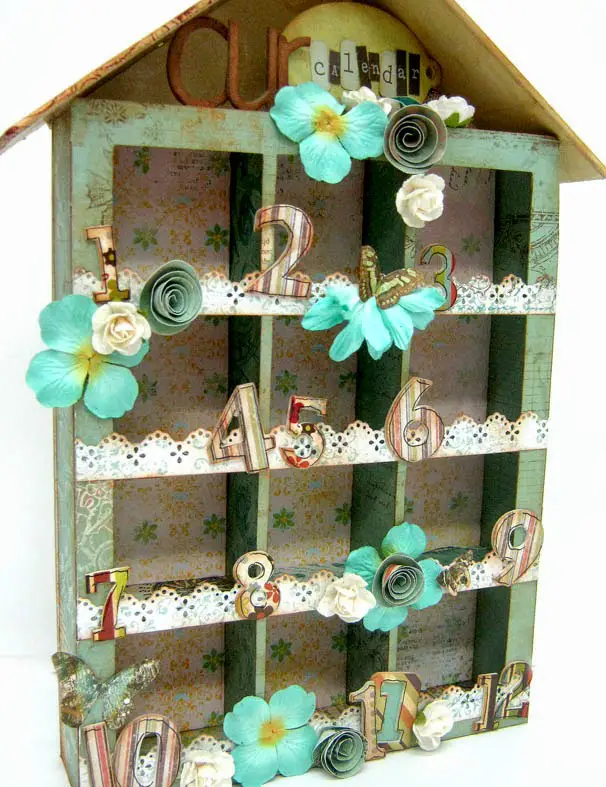
You'll need:
- Chipboard
- Pattern paper
- Border punch
- Flower embellishments
- Chipboard numbers and letters
- Letter stickers
- Distress ink
CONSTRUCTING THE HOUSE
- Watch the video to see how to make the chipboard house front and the measurements for other chipboard pieces
- Cover all chipboard pieces with pattern paper
- Build the house according to video
- Add month numbers to each compartment and embellish
No matter which perpetual calendar you make I hope you'll have a great organized year!
Sharing is caring - PIN IT!
Have fun creating!

