November 19th, 2012
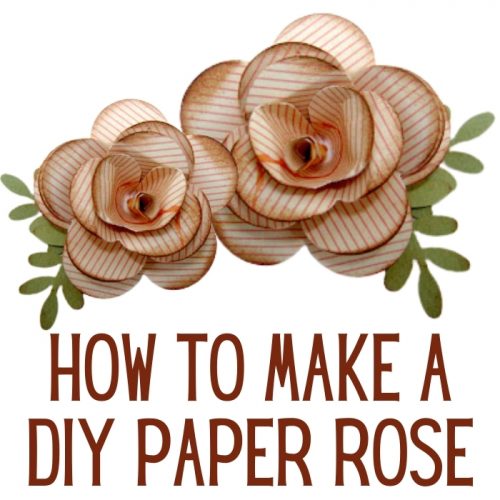
Inside: how to make a DIY paper rose flower for paper crafts When I need a specific embellishment and I can’t find it in my stash I make one this way I always have the perfect embellishment that matches my project in color and size. This is also a great way to use my paper scraps instead of throwing them away. This DIY paper rose technique require the following: 6 petals flower punch Double sided cardstock Leaf punch (optional) Here are three different size punches you can use to make this flower: HOW TO MAKE A DIY PAPER ROSE STEP 1 Punch 3 flowers. If you don’t have the right punch you can print a flower image on the computer, cut it and trace it on your cardstock. Left flower: make a cut from the edge between two petals to the center. Middle flower: cut out one …
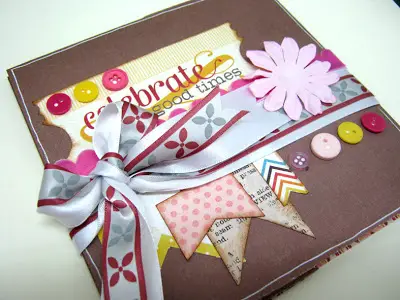
You know I love creating project from only one sheet of paper! Here is another fun and easy tutorial for The Robin’s Nest DT. This is a great way to create a project without using too many materials or money. All you need is: one sheet of cardstock, two ribbons and a few embellishments! You can visit The Robin’s Nest blog and website 1. Fold a double sided cardstock in four. Open all folds. 2. Start working on the upper right square. Cut the cardstock on the vertical fold line from the edge to the center. Widen the cut a little bit. 3. Cut the cardstock on the horizontal fold line half way from the center towards the right. 4. Fold the upper right square in half to the right. 5. Cut the cardstock on the new fold line from the center half way to the top. 6. Fold upward. 7. Fold again to the right. 8. Fold downward on …
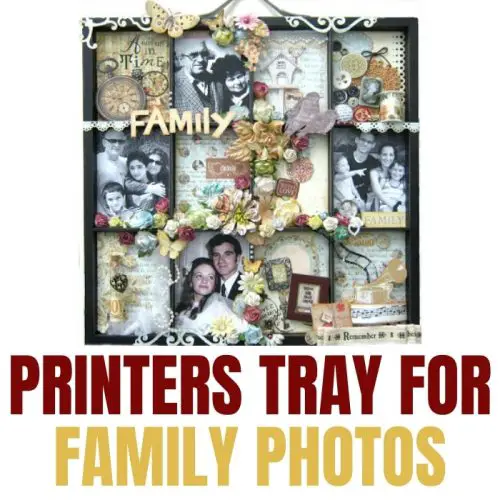
Inside: how to make printers tray for family photos I was lucky to have grandparents until I was in my fourties. When we celebrated my grandmother’s 80th birthday I wanted o make somehing special for her. I made her a printers tray displaying treasured family photos of three generations of her family. WHAT IS A PRINTERS TRAY A printers tray or letterpress drawer is a thin wooden tray with compartments. These drawers were part of a larger printing cabinet that were common between the 15th and 19th centuries. The small sections store letter stamps or “sorts” that were used in a printing press for printing. Letterpress drawers are also referred to as type cases, type drawers and printer block drawers. HOW AND WHERE TO GET LETTERPRESS DRAWER Some people are lucky enough to find a tray or an entire cabinet in their attic, but this is a much less common occurrence since the …