Inside: 50 useful craft secrets to improve your life now
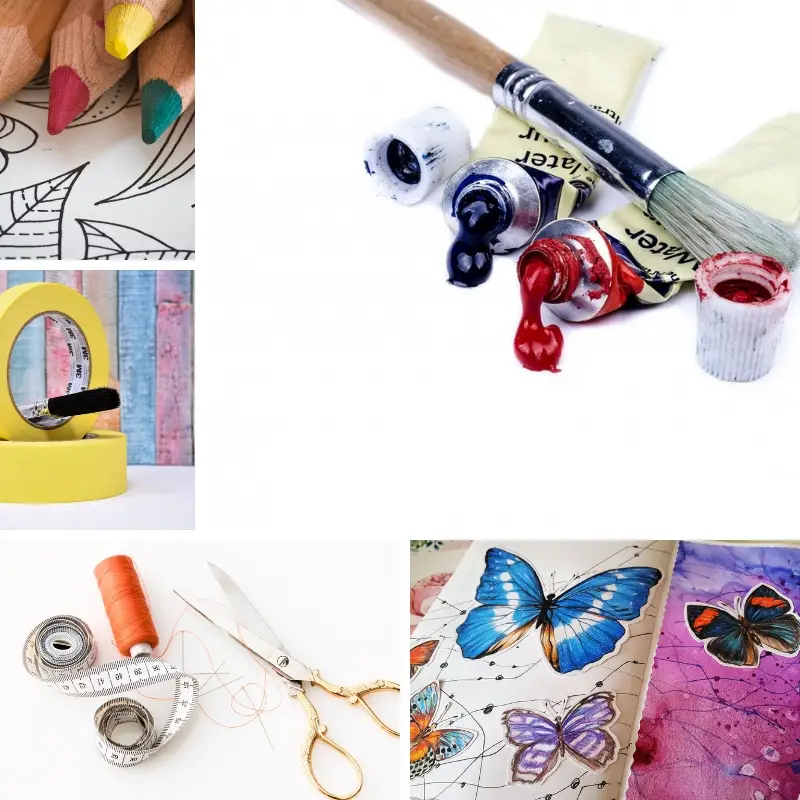
Crafting is not easy… it’s fun, relaxing and even therapeutic but it doesn’t always go smoothly. This list of useful craft secrets will definitely make your life easier and make you wonder how you didn’t know about them before! I have tried EACH ONE of these craft tips, so I can honestly say they work and therefor highly recommended.
ORGANIZING CRAFT SECRETS
- To maximize your craft space organization, store your important items at eye level. Keep your secondary items down low so that you can simply bend down to get them. Less used items should go up high, perhaps even where you need a step stool to access them. You have a lot of vertical space in a room – use it!
- Store your ribbons on a horizontal paper towel holder. You don’t have to hang it on a wall just place it on a shelf for easy rolling. But when you hang it on a wall it’s easy to cut the ribbon exactly where you want.
- Arrange brads, beads, eyelets and other small items in an ice cube tray so you can find what you want easily and have them organized.
- Shop at the kitchen department to find cheap unique storage solutions. I use spice racks and jars, pot hangers and even ice cube trays.
- Organize your craft papers according to one of these categories: size, single or stack, solid or pattern and theme. So much easier to find what you’re looking for this way.
Make your own boxes for storing craft paper:
- Take a large shoe box (that can fit a 12″ wide paper. Attach the lid to the box.
- Cut out one of the large sides.
- Wrap the box with pretty paper or fabric.
- Store your papers vertically it will take less space and be much easier to flip through.
- Keep your pens flat like they are laying on a desk. This is the best way for most pens to be stored. I know they look pretty in your special cup with the caps up facing you, but over time the ink will drop to the bottom of the pen and you can kiss it goodbye. It happened to me…
- Keep your ink pads upside down to prevent them from drying.
MIXED MEDIA SECRETS
- Fill a cake piping bag with modeling paste and create your own patterns without stencils!
- I like to use tape on my art journals for texture or in the center for extra strength of the binding. The problem is that tape gets really sticky on its roll and doesn’t release properly. My solution: freshen it in the microwave for 10 seconds. Heat softens the adhesive for easy release!
- When you need to use sprays in a project use a shoe box to spray in and protect your table.
- When using paints and inks make the most of them by using the leftovers to prep other projects like backgrounds for art journal pages.
Here’s how:
- Load the brush with the leftover paint and color the page or add brush strokes.
- Take a stencil still cover with paint and press on the page paint facing down.
- Stamp page with stamps still loaded with ink.
Now you have three new backgrounds in your art journal!
- If you are in the middle of painting something and don’t want to wash all the brushes, simply wrap them in plastic wrap. When you return later to finish painting, your brushes will be ready to go and not all dried up!
- When you want to prevent your acrylic paint from separating or bleeding on the surface add a drop of liquid soap in the acrylic paint container.
- If your art journal page didn’t come out as you wanted paint it with white gesso and start over!
- Quotes are a great way to express what you’re feeling, but without the work of coming up with just the right words. Quotes are universal on one side but very personal on the other because each person can read a different meaning for them. So use them on your projects.
GENERAL CRAFT SECRETS
- If you don’t have an embossing mat use plumbers gasket with embossing folders instead. That will eliminate any folder lines.
- Burn the edges of your ribbons with a lighter to prevent their edges fraying.
- Use multiple layers of foam tape to give more dimension to elements in your project. You can play with the height of the embellishments by stacking more or less foam tape.
- How often do your fingers get dirty when you paint small items? Stick them on double sided tape when painting so they will not move anywhere and you will not need to hold them.
- Do you use Duct Tape in your craft often? isn’t cutting it a real pain in the…? Well if you wipe your scissors with a baby wipe before you cut you’ll find out that cutting becomes a piece of cake.
GLUE SECRETS
- Leave a pin stuck in your glue bottle tip to prevent it from clogging.
- If you need a smaller tip on your glue bottle don’t buy a new bottle! Wrap the tip with tape and cut the edge as small as you need. Remove the tape when you finish
- Craft supplies costs a lot and glue is no different. If you want to make sure you use all the glue in the bottle, heat it in the microwave for 10 seconds it will help the last bit of glue come out of the bottle.
- if you use a hot glue gun to glue items to your project and then change your mind, don’t worry…just heat the glue with your heat gun until it loosens up and re position your item.
- Do you love your hot glue gun but hate the annoying strings you get when using it? If you keep your glue sticks in the freezer it will prevent the long strings!
- Wipe the tip of the glue tube with lotion using a tissue. It prevents it from sticking.
- Glue the edges of the hot glue gun sticks together for a smooth use when you need to add a new stick. I used to have so many problems with adding a new stick until I got this tip from my YouTube channel viewers!
Discover what are the 8 adhesives a crafter must have?
STAMPING SECRETS
- You’ve stamped an image and spent an obscene amount of time coloring it in, ever so carefully…and then you slip outside the lines. Don’t throw it away and start over! Simply color over the ink with a white gel pen and let it dry — no one will ever know the difference.
- Did you notice that after awhile your stamps stop clinging to your acrylic block? That is because they get a layer of dirt, skin and other materials from crafting. Clean them with hand sanitizer and restore them to their original state. Your stamps will be clinging easily!
- Extend the life of your ink pads by storing them upside down. Write the color of each ink on the bottom so you won’t need to turn each pad to see what color it is.
- Add a little Glycerin directly on a dry clear embossing ink pad and it’ll bring it back to life. Find 10 more uses for Glycerin in the craft room here.
CARD MAKING SECRETS
- Avoid taring your paper while scoring by placing wax paper over your pattern paper.
- Punch or cut parts of an old greeting card, the parts you like with a pretty image or background, and create gift tags for birthday or holiday gifts.
- Create cards in shapes like circle or heart to make interesting cards.
Do this:
- Fold a double sided cardstock in half.
- Cut the cardstock into a circle or a heart shape leaving a small part of the fold un-cut so you’ll still be able to open and close the card.
- Embellish!
- When making a folded cards embellish the inside of the card as well to make it even more special.
SCRAPBOOKING SECRETS
- When you have to fussy cut make your life much easier by rotating the paper and not the scissors. It takes some getting used to but once you do it cutting paper becomes faster and easier. Find out how you can fussy cut like a pro!
- Make your paper look old with a browned, unevenly-colored aged appearance and parchment-like texture by dipping the paper into coffee or tea. Find more tutorials on how to age paper here.
- For fast page accents, simply cut out designs from patterned papers. Adhere these cut accents to your page and you’re done! Saves money too.
- Mix fonts in your page title to create a dynamic, fun and random look to your layout!
Here’s how:
- Decide on the colors for your title.
- Pick letter stickers and chipboard letters from different packs.
- If you have letter punches punch out a few letters from a matching paper.
- Combine them all to one title also adding stamped letters with matching ink.
- If you’re missing a letter you can always add it in your handwriting or find a sticker or chipboard letter in a neutral color.
- When you finish a project instead of throwing away the leftover papers punch them into different shapes and keep for later pages or cards.
For more scrapbooking tips click here.
CRAFT TOOLS SECRETS
- Sharpen your trimmer blade with a nail file and extend its life!
- Scissors are always an issue with crafters. Even though we guard them with our lives and let no one near them so fabric scissors will stay sharp and not used for paper, we always end up with some dull pairs. The best way to sharpen your scissors is simply cut a sandpaper a few times.
- Punches tend to stop working sometimes…the best way to bring them back to life is first punch through aluminium foil, which will sharpen the punch and then punch through wax paper which will lubricate it. The combined action will probably restore your punch to action.
- Instead of using a fancy trey when embossing, spread the powder while the project is on a paper.
Do this:
- Fold a plain white paper in half and place project on paper.
- Spread embossing powder.
- Pick up paper from both ends and while folding slightly put powder back in the container.
CLEANING CRAFT SECRETS
- If you craft like me then you have clothes with acrylic paint stains on them that you can’t clean. Just use rubbing alcohol. Saturate the area with the alcohol and then scratch off the paint.
- My stencils are always covered with paint because i’m too lazy to clean them. Sometimes I wipe them slightly with a baby wipe and sometimes not even that. Once in awhile I take all my stencils and submerge them in rubbing alcohol. After a few minutes the paint just peels of and all I have to do is give them a little rinse.
- I hate cleaning my brushes. I always say to myself finish the project and then go clean the brush. By the time I finish the paint usually dries and I find myself throwing away another brush. Then I found a really great solution: soak your paintbrushes in fabric softener or hair conditioner and the paint will just be easily wiped off.
- Clean your sea shells with 1/2 on 1/2 solution of bleach and water.
Click the link or the image below to get a PDF version of the 50 useful craft secrets to print out and hang on your craft room wall or save in your desk!
DO YOU HAVE A CRAFT TIP TO SHARE? LEAVE A COMMENT!
SAVE it for later – PIN IT!
Have fun creating!


10 Responses
If you don’t have the plastic closures in the previous tip use a toothpick instead.
These are really good tips. Consider spell and grammar check to make them even better. Seems picky but will make you look like a pro. Thank you for the list!
Hi, I clicked the link for the 50 craft secrets, but didn’t see anywhere to enter my email. Am I missing something? Thanks!
Click on the big blue button that say: I want the 50 secrets printable version
Thank you Einat for this awesome list of Craft Secrets. They are more than useful, they are much need to know. I have printed them out and have them hanging by my desk so they are handy for me to look at when a question arises or I am stuck. Also, so if I find more secrets and tips that work well and they are not on the list I can add them. So, again thank you for your hard work of listing these and then for your generous spirit in sharing them with us out here. 🙂
YES! Please add them and let me know so I can share them with other too 🙂
I learned this great tip from my friend, Suzette Lee: When packing washi tape for a crop, use old gift cards & hotel room cards. You can wrap a good 3-4 feet of washi tape neatly around them. You’ll be able to wrap 3-4 different tapes on each card. Takes up minimal space in your craft bag!
Great tip! Thanks Stephanie
Save the little plastic closures from Thomas English Muffins, and some breads. Use these at the end of your washi tape (and other tapes) roll so you don’t have to fight to find the end!
Another great tip! You’re on fire!