Inside: how to make fake snow for crafts and how to add it to a winter card
I love winter! Unfortunately I live in a warm country so winter here amounts to a little rain and cool, but not cold tempratures. I wish we had some snow...
But since we don't, only on one mountain peak up in the north, I have to be satisfie with fake snow on my crafts and cards.

DIY FAKE SNOW
Apparently there is more than one way to make fake snow at home and you can usually need only two ingredients to make fake snow. Change the quantaties in accordance to what you need the fake snow for.
Here are a few ways:
- Mix together equal quantities of cornflour and bicarbonate of soda. Once combined, gradually add a very small amount of water into the bowl and mix together until you reach a good consistency.
- Mix 2 1/2 cups of pure baking soda with 1/2 a cup of white hair conditioner. Change the quantaties according to the same ratio if that's too much.
- Add baking soda, a little shaving cream and mix together. Add a little glitter for sparkle.
MY FAKE SNOW RECIPE
My recipe has no baking soda at all! It is all created with craft supplies I have in my stash.
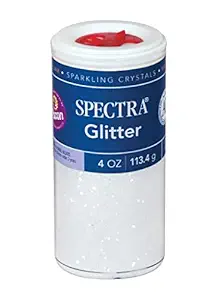
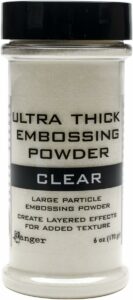
My fake snow is created by mixing white and clear UTEE with glitter and glossy accents.

WHAT IS UTEE
UTEE stands for Ultra Thick Embossing Enamel. It is a specially formulated large particle embossing powder that you can use with a heat tool to produce textured embossing. It can also be used by pouring it into moulds to create 3D effects.
GLOSSY ACCENTS
Glossy Accents is a type of transparent glue that binds all the materials together.
GLITTER
It's best to use a powder glitter and not flakes because the glitter is just meant to add a little sparkle and not add to the consistency. You can mix white glitter with a little silver glitter to enhance the sparkle effect.
You can get the ingredients for my fake snow recipe here:
The Full recipe and preparation process is detailed in the video tutorial.
HOW TO USE FAUX SNOW

You can use fake snow fo many uses like decoration, fun activity for kids and in crafts.
Here's a tutorial to make a winter card with a snowy scene.
- Make a background with blue and light blue inks. You can also use a light blue cardstock or pattern cardstock as the base of the card.
- Stamp the background with a pattern stamp like dots or little shapes to make a falling snow effect. Emboss some of the stamped pattern with clear embossing powder and the other with white powder.
- Color chipboard letters with the same ink colors. You can also color the chipboard with crayons, markers, colored pencils etc.
- To assemble the card take a vine and attach it to the card. Instead of a vine you can use a chipboard or wood tree.
- Add the snow on the bottom of the card and on the tree branches.
- Attach the letters and add a little snow on them as well.
After the snow dries completely it will stay on any surface you attach it to, so there is no problem mailing this card!
Need some Christmas card inspiration and ideas? Check out the 48 Christmas Card Idea eBook!
Sharing is caring - PIN IT!

Have fun creating!


