Inside: how to make a tunnel card
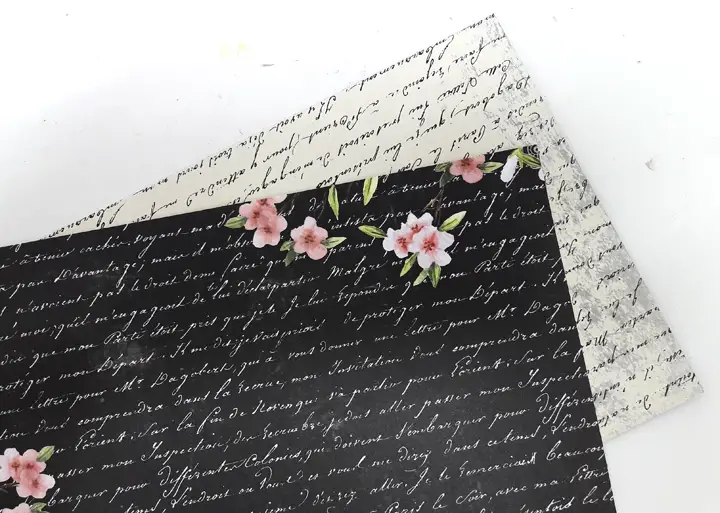
I love making cards but I always try to give them an interesting twist. This card looks regular on the outside but inside there is a 3D surprise when you open it!

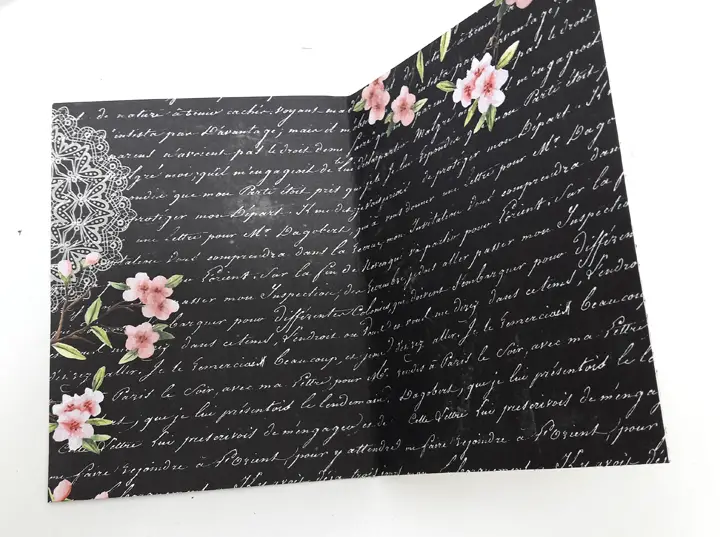
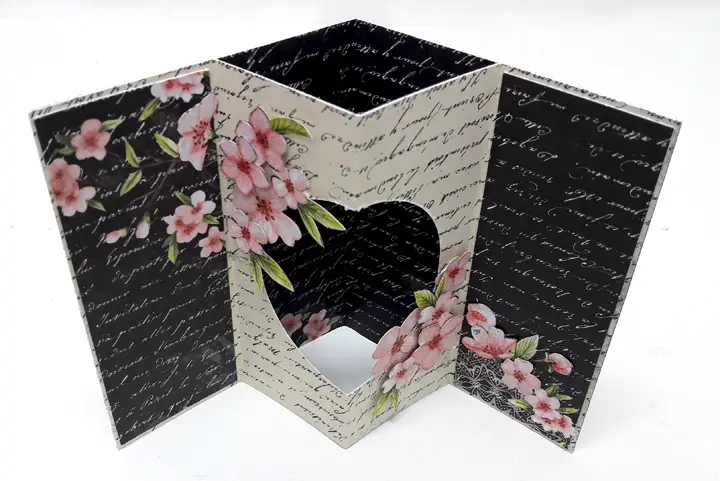
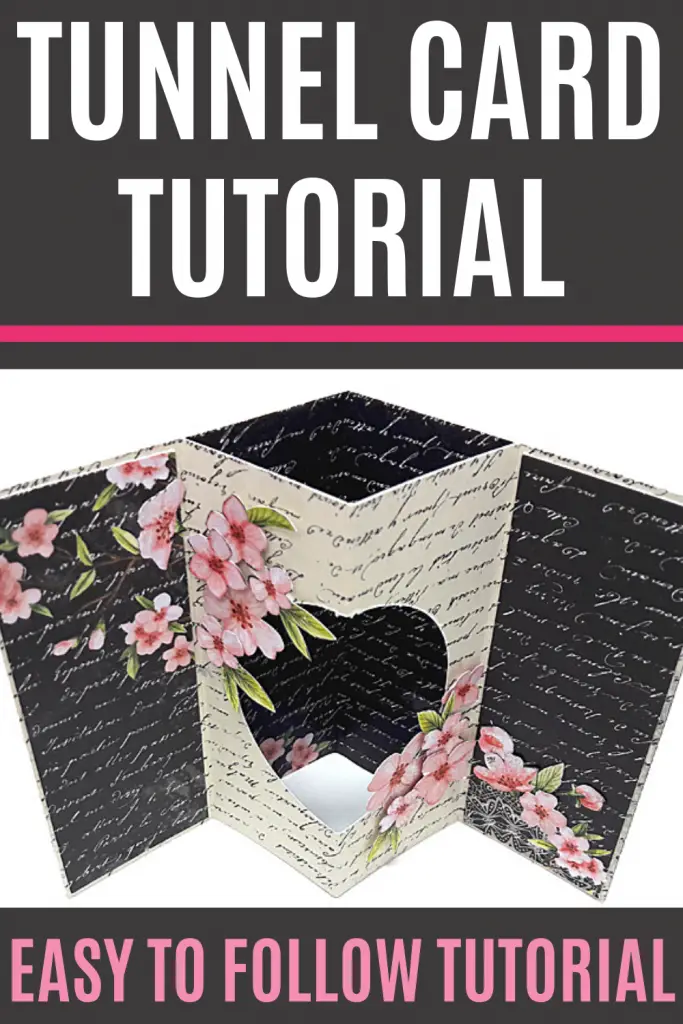
A tunnel card lets you build up dimensional scenes on your paper craft projects, and it works really well to create fun-filled scenes. You can also make a tunnel card like I did with no scene just the tunnel to make the wow factor.
Making this type of 3D effect is not limited to cards only. Here are some tunnel paper crafts ou can make:
Start with cutting two 5 1/2″ x 8 1/2″ double sided cardstock. One piece will be the tunnel and the other piece will be the background. Try using contrasting colors of double sided cardstock to maximize the effect of the tunnel.
Fold the background piece in half lengthwise.
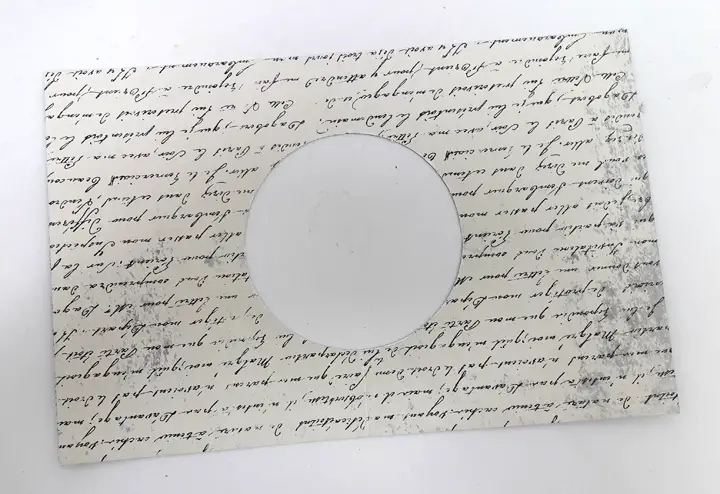
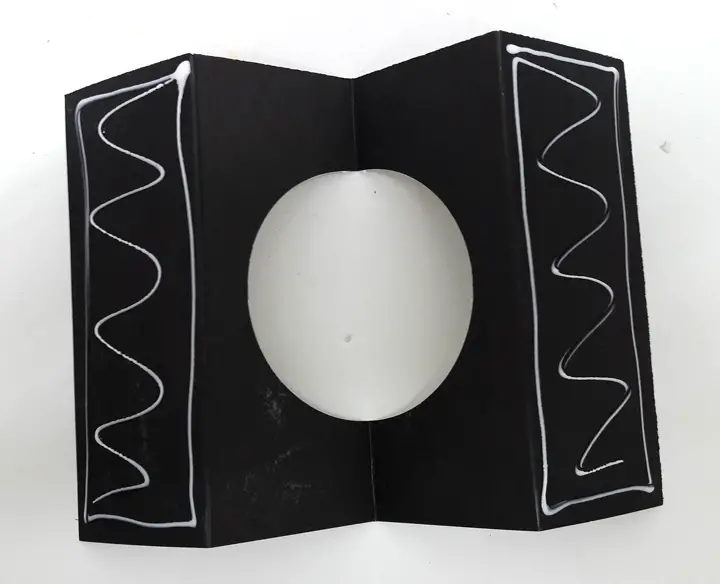
Score the tunnel piece at 2 1/8″, 4 1/4″ and 6 3/8″.
Cut out a circle or a square in the center of the tunnel piece. You can use a die, a circle cutter or even a punch if you want a circle or an oval shape. If you want to cut out a square a 3″ x 3″ square will be good.
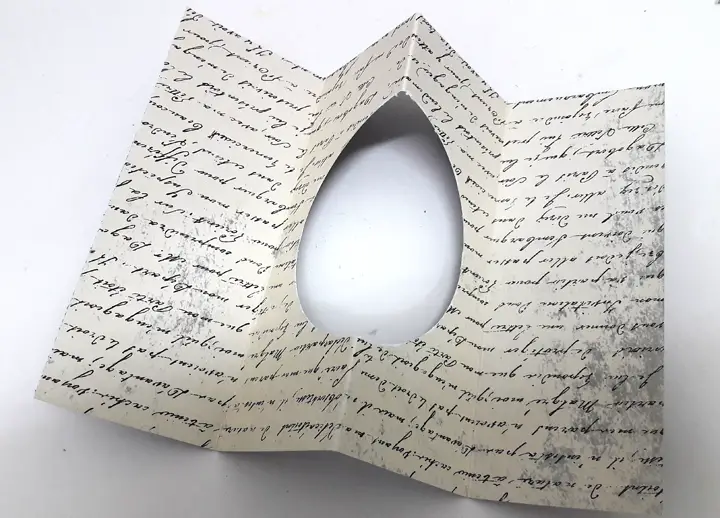
Fold the tunnel paper in an accordion shape according to the score lines.
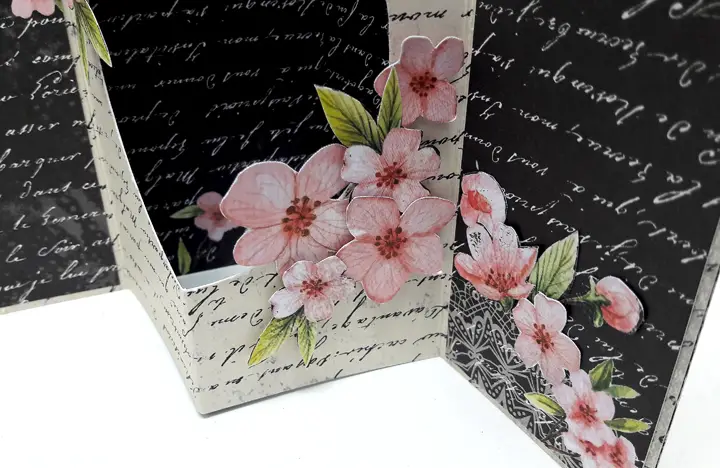
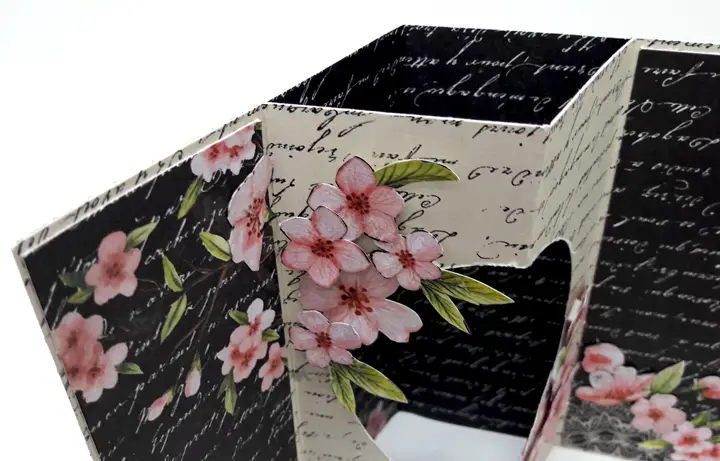
Apply glue to the back side of the tunnel folded paper and attach to background paper.
Cut two 2″ x 5 3/8″ pieces from the same paper you used for the background and attach to front of the card. This is optional – you can leave the paper you have attached.
Fussy cut flowers or any other image you have on your paper and embellish the card! You can also use cut out shapes, stickers or other embellishments. Just don’t make it too bulky so it’ll fit inside an envelope.
If you’re looking for more card inspiration check out the 48 Card Idea eBook where you’ll find 48 card tutorials with step by step instructions, detailed photos, tips and tricks for makig your cards look amazing including a supply list!
Sharing is caring – PIN IT!
Have fun creating!


17 Responses
I love love love this card, and you did an amazing job with the tutorial! Thank you for sharing!
You can turn this layout int a spinner. LOTS of tutorials on the internet!
What do I need to look up to find out how to make this a spinner card?
Check out my YouTube channel
Beautiful card.. interesting and wonderful surprise when the recipient opens it. Thankyou for a very easy step by step guide to learn how to create this
Just stumbled upon this FUN fun fold…just in time to work on my Christmas cards! Thanks for sharing. Your choice in printed papers is lovely!!
What a beautiful card! Great tutorial. Thanks for sharing.
Thanks so much for sharing. What a beautiful card! Great tutorial.
Thanks so much…just love!
Love it……
Thanks Pat!
Very pretty card. Great tutorial.
Thanks Marilynn!
Beautiful
Thanks Kim!