Inside: what you need to know to hand stitch a journal cover
I’m a paper hoarder with lots of craft paper of all kinds. Not only that but I also don’t throw many leftover paper so I have a lot of paper scraps too. I always challenge myself to use all these papers because it bothers me to have so much papers just sitting there… my latest idea was to create a junk journal with signatures from paper scraps and regular printing paper.
DIY STITCHED BOOK COVER
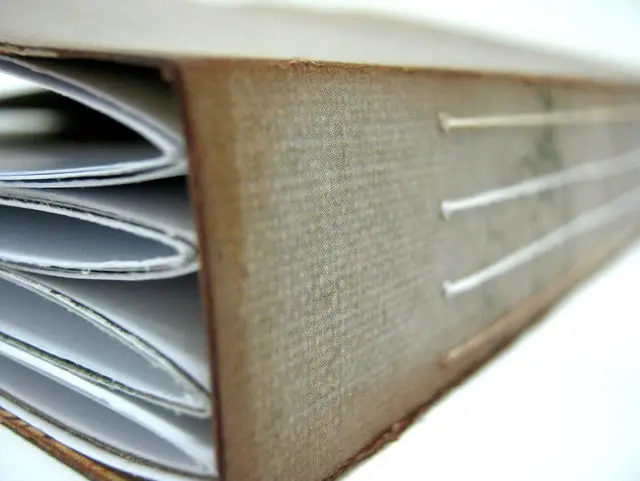
Traditional book binding is done with a needle and thread in many different ways. There are many different stitches you can sew a book or a journal cover but the most popular and easy method is sewn binding which is a strong, durable binding where inside pages are sewn together in sections or signatures.
THE SEWING BINDING PROCESS
When sew binding a book, organize pages into groups of 3 to 6, called signatures, and fold them together. Stitch the pages together individually along the folds. Threads go through each page several times before being tied off. Once a group is finished, it’s sewn together with another group with a thread. Then you can eithe stitch the signatures to the cover or glue them.
PROS AND CONS FOR STITCHING A JOURNAL COVER
PROS
- Stitch bound books lay flat on a table when opened, which makes them ideal for books with images that span across two pages.
- Extremely durable and high quality, the binding will stay together as long as the pages last.
- It is designed to withstand wear and tear, making it an excellent choice for books that will be well-used over periods of time, such as journals.
- Journalss that use sewn binding are tamperproof, you can’t remove a single page without damaging the entire book.
- Pages can’t fall out as they are sewn together in signatures.
CONS
- Sewn binding is more time consuming than other binding methods.
- There is no option to add or remover pages or change the order of the pages.
- Can’t be used for single pages.
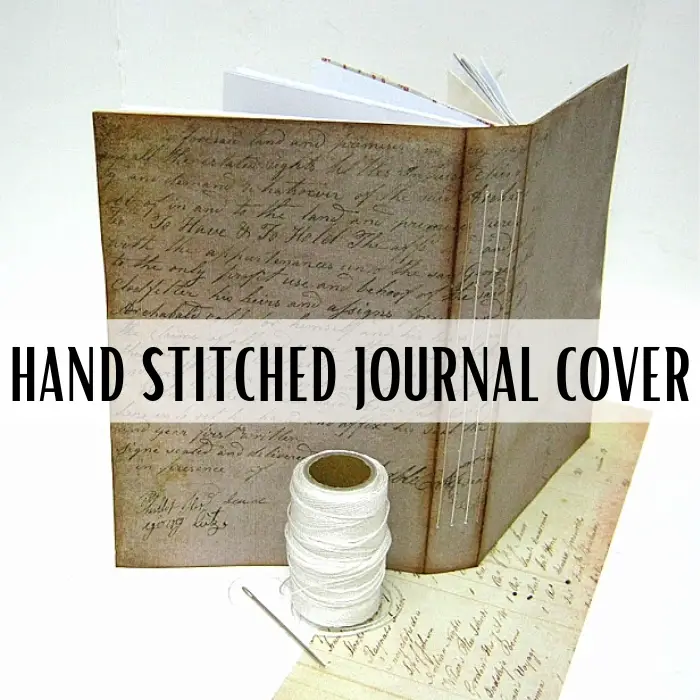
HOW TO STITCH A JOURNAL COVER
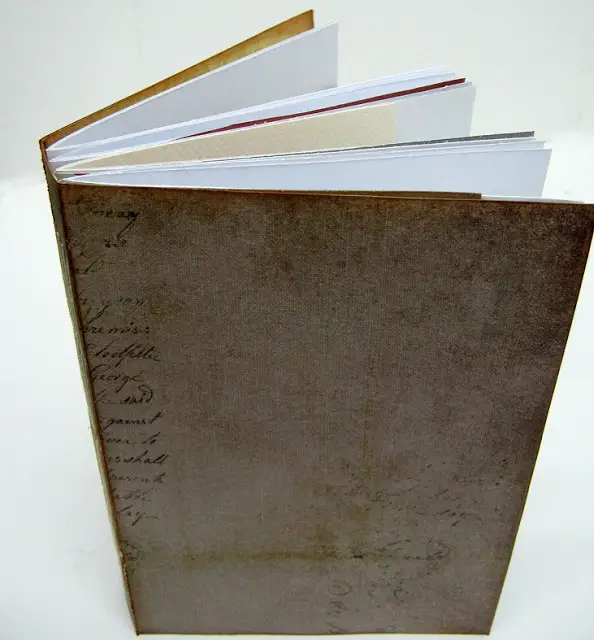
- Start with deciding the size of the journal. Mine is 5 1/2″ by 8″.
- Then you need to go through your paper scraps and pick out papers for your journal. The pages should be 5 1/4″ by 8″ at the maximum. Meaning you can use smaller pieces but not larger.
- Once you have enough papers you need to create signatures. Signature is a section of the book made up of a few folded papers. I made 4 signatured for this journal.
- When the signatures are ready you need to prepare your cover. I made the cover from two cardstock glued together. you need a soft cover in order to be able to stitch the signatures to it. The stitching process is done in two “eight” shapes with a linen thread and a needle. It requires accurate measuring but it’s an easy process that anyone can do.
Watch the step by step video tutorial to learn the entire process:
HAND STITCHED JOURNAL COVER TIPS
- There are many types of binding stitches but I used the fastest and easier one. If you want to try other types of stitching you can search Google for more options.
- The journal cover needs to be strong enough to carry the weight of the pages so it needs to be thick even if you want a soft cover. The best options are to use heavy cardstock for a paper cover and a fabric wrapped cardstock for a fabric journal cover.
- Always make the cover slightly wider than the combined width of the signatures to allow room to add photos, journaling and paper embellishments.
- Make the signatures from different size of papers so not all the pages will be the same and your journal will be more intereating and artistic.
- You can also cut the papers into shapes like heart, circle or star or even punch the edges with a border punch to make the pages even more surprising.
Find more ideas to make junk journals and use your paper scraps here.
Sharing is caring – PIN IT!
Have fun creating!


2 Responses
Looking forward to creating a junk journal ad i have plenty of beautiful scraps.
Thank you so much for the information.