HOW TO MAKE A CONFIGURATION BOX


Inside: how to make a configuration box with 3D objects and little found treasures


I have a confession to make... I'm a hoarder. My house is not full of stuff but I do have A LOT of metal embellishments that I collect from all kinds of places. Why I collect them is a good question - something about metal objects fascinates me especially when it comes to add them to mixed media and altered project. They have a really interesting look in a craft project that I can't resist. However collecting is nice but what do you do with all the metal embellishments you have?


I found an answer... fill a configuration box!


WHAT IS A CONFIGURATION BOX


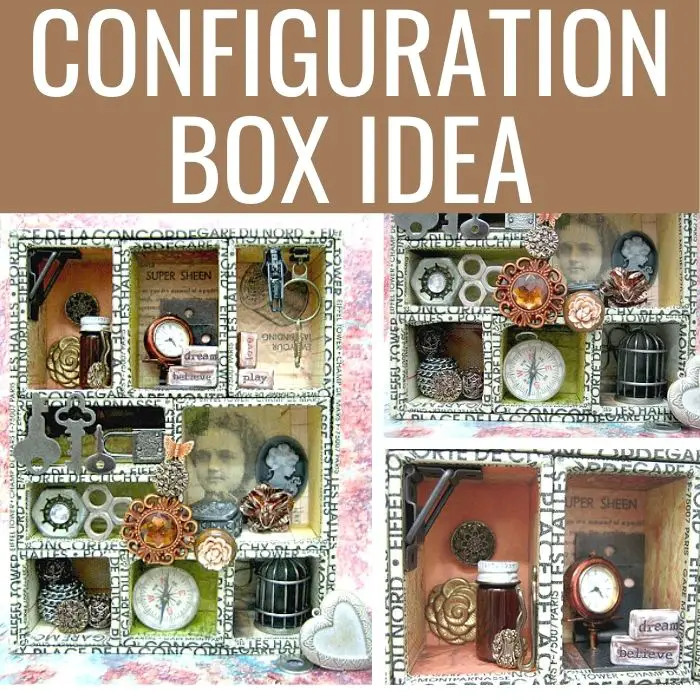
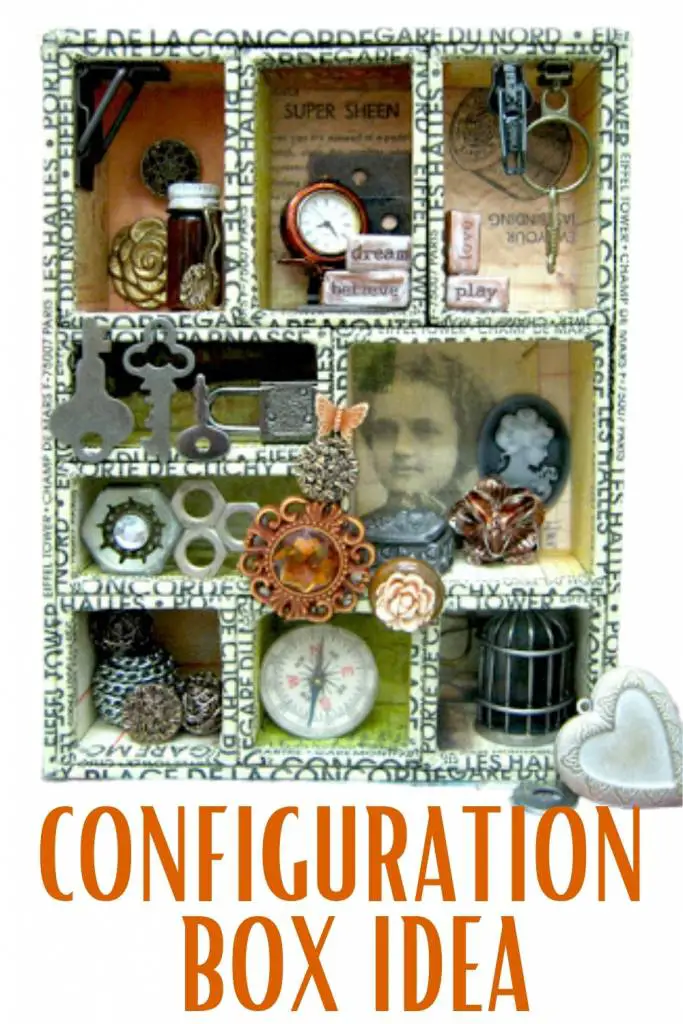
Configuration box is of a shadow box with compartments that can be filled with 3D objects. You can find wooden boxes ad chipboard boxes from various brands. Each brand has a different order and sizes for the compartments in the box.

For this project I used the Tim Holtz configuration box. Unfortunately it was discontinued. I know you can still find it on etsy or ebay.


OBJECTS TO PUT IN A CONFIGURATION BOX


You can put any object that fits the space inside. Add different objects to match different themes:


CHRISTMAS

Fill a Christmas box with embellishments like a 3D deer, small ornaments, cut out paper images, stars and homemade snow.

To make this Christmas shadow box from scratch check out the tutorial series here

Make homemade snow for any winter or Christmas project.


KIDS

Make a configuration box that is filled with old toys, dolls and comics. This can be a great way to save cherished toys instead of throwing them away!


ROMANTIC

Great idea for Valentine's day or an anniversary - make a configuration box that is full of romantic photos, hears, lace ribbons and flowers.


FAMILY

LOvely way to display famiy photos and small memorabilia along with small embellishments like sewing objects, small bicycle, birds and nests etc. Basically any object that fits your family will be a great addition.


HOW TO MAKE THIS PROJECT


  1. Paint the outside of the configuration box with acrylic paints or cover it with patterned paper. You can do a mix of both paint and paper - for example paint th walls and cover the inside with paper.
  2. Repeat the process on the inside of each compartment. If you want to cover the inside with paper you'll need to measure each compartment to cut he papers accurately because the measurements can slightly change.
  3. After the box is dry or covered with paper cover the front edges of each compartment with washi tape to get a cleaner look. Match the washi tape pattern or color to the colors and patterns of the paper or paint.
  4. Add embellishments to the compartments. To make things inetersting try adding the objects to all sides ofthe compartment, even on the top and on the outsude as well. You can also change the direction of the embellishments.


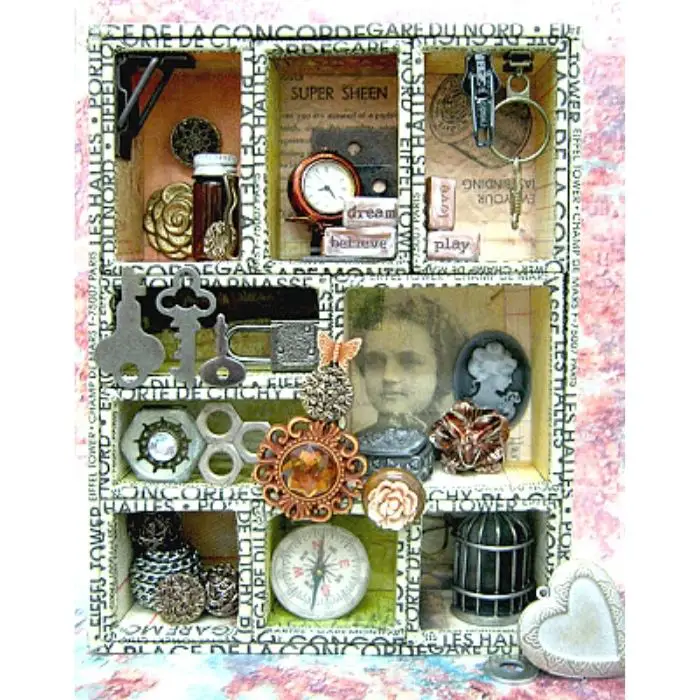
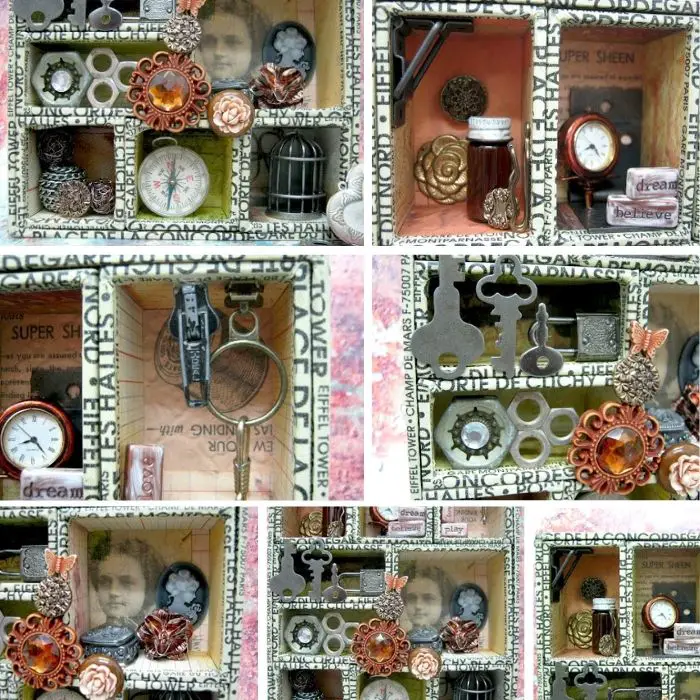
Here are some close up photos of all the embellishments I added.


MAKE YOUR OWN EMBELLISHMENTS


You can customize and make your own embellishments to put inside the configuration box:

  • Color paper flowers with a color that matches your theme. I painted some flwers in gold and copper colors to match the vintage theme.
  • Attach a few embellishments together to form a larger object - I attached a few cogs to create a screen or grid in one of the compartments.
  • Use household items like small bottles, zippers and hinges.
  • Cut out images, like a person's head and put it inside a small charm or frame.
  • Attach rings or objects with holes together to attach to the top of the compartment to create a hanging embellishment.


Here are some options to get configuration boxes - click the image to see more options!


Sharing is caring - PIN IT!


Have fun creating!


Leave a Reply

Your email address will not be published. Required fields are marked *

five + two =

Einat Kessler

Welcome!


Hello crafty friends!
I'm Einat: creative professional,mixed media artist, scrapbook and paper designer, altering enthusiast and class instructor.
Click here to learn more about me and my creative journey

Contact me:
kessler054@gmail.com


Social Links


Newsletter Signup


Craft and Hobby Association


Copyright Information

Copyright


The designs, pictures and instructions listed on this blog are provided here for personal use only and may not be sold, reproduced or used for commercial or submission purposes in any form without my written permission.