December 16th, 2014
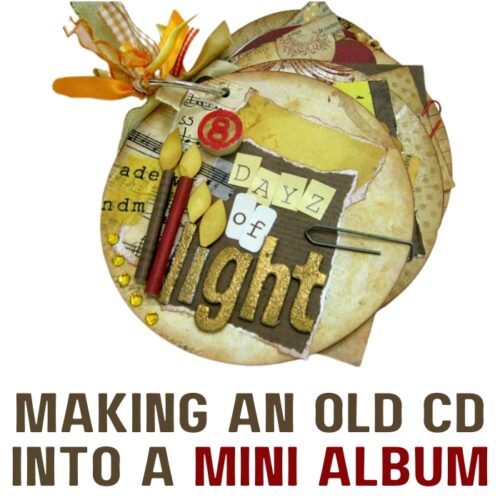
Inside: how to make an old cd into a cherished mini album Raise your hand if you have old cd’s in your house and many of them. Now that we use other technologies to listen to music those old cd’s are just not needed anymore. So the question is what to do with them? There are many old cd crafts you can make starting from coasters and clock to wall hangings and mini albums. WHAT CAN YOU MAKE FROM OLD CDS The types of arts and crafts you can make with old cds are almost endless. Here is what you need to conside: The circle shape is unique and can fit many projects like coasters, wall hangings and mini books Cd’s have a shiny mirror like surface that is fun and versatile You can break its shape and use the pieces for mosaic art or jewelry IDEAS FOR ALTERED CDS Mosaic projects like …
December 14th, 2014
Inside: how to make a one page wonder interactive mini album Sometimes I’m in a strange mood, on one hand I want to make a fun, original and complex project but on the other hand I don’t feel like taking out a lot of supplies and making a big mess. My solution… making a one page wonder interactive mini album! ONE PAGE WONDER INTERACTIVE MINI ALBUM This project is the highlight of mini albums! Not only does it have many pages and can fit at least 10 photos, but it has pockets and flaps AND it is made from only one sheet of double sided cardstock. Making all these pages and interactive elements from only one piece of 12″ x 12″ cardstock requires careful planning, cutting and measuring. The best way to build it is with a detailed sketch. HOW TO MAKE AN INTERACTIVE MINI ALBUM FROM ONE PAPER Start …
December 7th, 2014
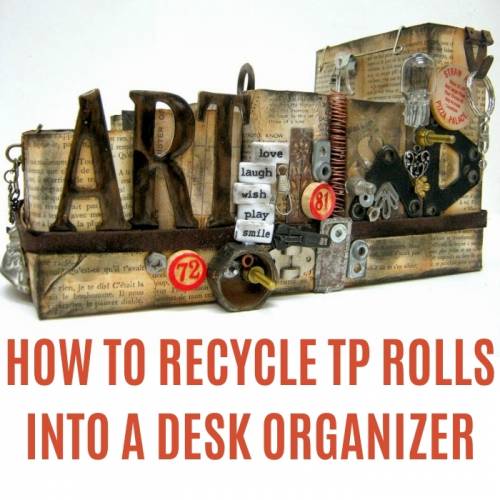
Inside: how to recycle tp rolls and empty cardboard boxes into a desk organizer I was recently asked by a fellow crafter to complete the sentence: “you know you are a crafter when: ___”. Well the answer for me was easy… when everything I see I immediately think how I can make it into something else and what kind of craft project I can make of it. This was true when I had to throw some tp rolls and empty cardboard boxes last week and I thought why don’t I make something out of them instead of throwing them away. So it happened I was in need of a new and improved desk organizer… RECYCLE TP ROLLS AND CARDBOARD BOXES When you’re a crafter and you care about the environment throwing away tp rolls and food packages seem like a terrible waste. That’s why recycling has become so popular and one person’s trash is another …
November 16th, 2014
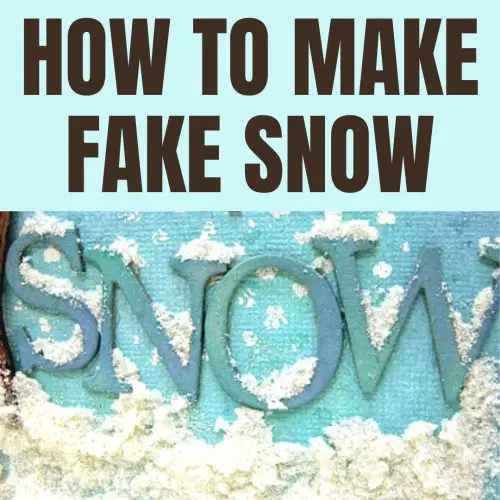
Inside: how to make fake snow for crafts and how to add it to a winter card I love winter! Unfortunately I live in a warm country so winter here amounts to a little rain and cool, but not cold tempratures. I wish we had some snow… But since we don’t, only on one mountain peak up in the north, I have to be satisfie with fake snow on my crafts and cards. DIY FAKE SNOW Apparently there is more than one way to make fake snow at home and you can usually need only two ingredients to make fake snow. Change the quantaties in accordance to what you need the fake snow for. Here are a few ways: Mix together equal quantities of cornflour and bicarbonate of soda. Once combined, gradually add a very small amount of water into the bowl and mix together until you reach a good consistency. Mix 2 1/2 cups …
October 5th, 2014
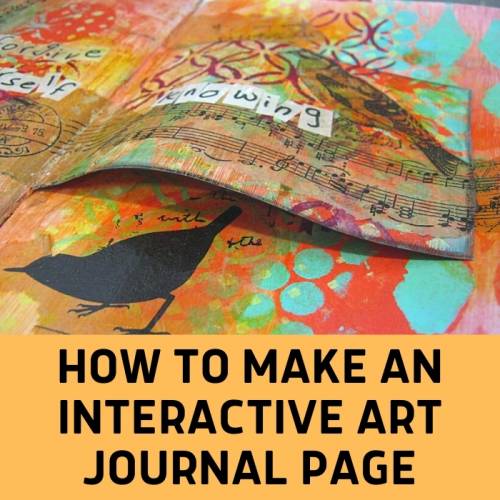
Inside: how to make an interactive art journal page There are two types of artists: those who do what is comfortable to them and those who always challenge themselves to step outside their comfort zone and try new things. I’m more of the second type… I love making interactive mini albums so I thought why not try make an interactive art journal page. WHAT IS AN INTERACTIVE ART JOURNAL PAGE In every interactive design you must have something that moves and engages the viewer. They have to open, flip, slide or turn something in the design and that is why it’s called interactive. Because the viewer is not only watching he also interacts with the design. The same goes for an interactive art journal page. A page like that will have a moving element that the viewer can interact with and discover something more. MOVING ELEMENTS IN ART JOURNALING Any interactive element …
September 27th, 2014
Inside: how to make altered matchboxes and easily recycle them into a drawer vanity. I don’t like to throw things away. I’m not a hoarder but when I throw some things away, especially boxes of all types it always seems like a waste. I always think to myself there must be something to do with them instead of throwing them away. Usually I end up throwing them into the recycling bin, but every now and then I get a really creative idea – altered matchboxes! This time I took all my empty matchboxes and made them into a miniature drawer vanity. WHAT IS ALTERED ART Altered art is the transformation or alteration of ordinary, everyday objects into decorative pieces using a wide variety of different techniques and materials, for example, rubber stamps, fabric, paper, paint and fibres. It’s a broad term that includes many artistic styles or genres, but at its most basic describes …
September 20th, 2014
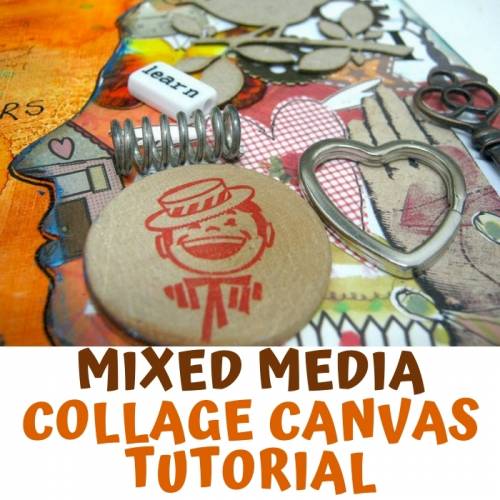
Inside: how to make a mixed media collage on a canvas I have a drawer full of items that I don’t even know how to call them. In this drawer you can find cogwheels and gears, metal parts and junk, chipboard and wooden pieces and all kind of miscellaneous objects. I call it my drawer of treasures because it’s full of amazing things I can use for mixed media collage, canvases and other projects. WHAT IS MIXED MEDIA COLLAGE In visual art, mixed media describes artwork in which more than one medium or material has been employed. Assemblages and collages are two common examples of art using different media that will make use of different materials including cloth, paper, wood and found objects. HOW TO MAKE A MIXED MEDIA COLLAGE A mixed media collage can be created in many different ways. However there are a few fundamentals to every project: Start with …
1
2
Next »